printable version printable version
Removing and installing drive shaft
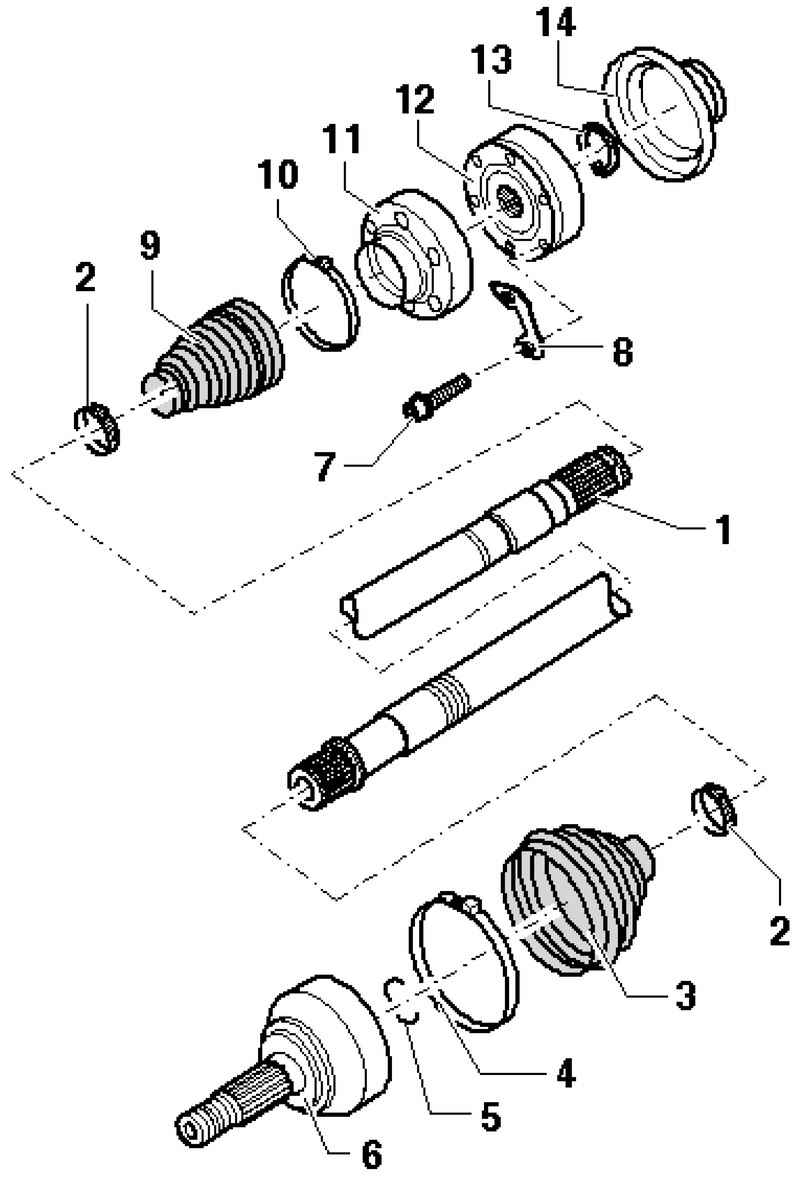
| Fig. 3.173. Drive shaft: 1 - a power shaft; 2 - a collar; 3 - Bellow joint; 4 - a collar; 5 - a lock ring; 6 - CV joint outer; 7 - the screw with the internal sprocket; 8 - Shim; 9 - inner CV joint boot; 10 - a collar; 11 - a cover; 12 - CV joint inner; 13 - a lock ring; 14 - cover
|
Withdrawal Before removing dvenadtsatigrannaya loosen the nut.
ATTENTION Switchable stabilizers before starting work to include. Otherwise inadvertent inclusion of stabilizers can lead to injury. |
NOTE Dvenadtsatigrannaya loosen or tighten the nut only when the vehicle is on wheels. Do not bring the car in motion, if dvenadtsatigrannaya nut is loosened. This can result in damage to the wheel bearing. If you want to move the car to remove the drive shaft, install outer joint and tighten to 150 Nm. |
Remove the wheel and lift the car. Remove the drive shaft of the main gear. For loosening the screws, use a nozzle T10099 / 1.
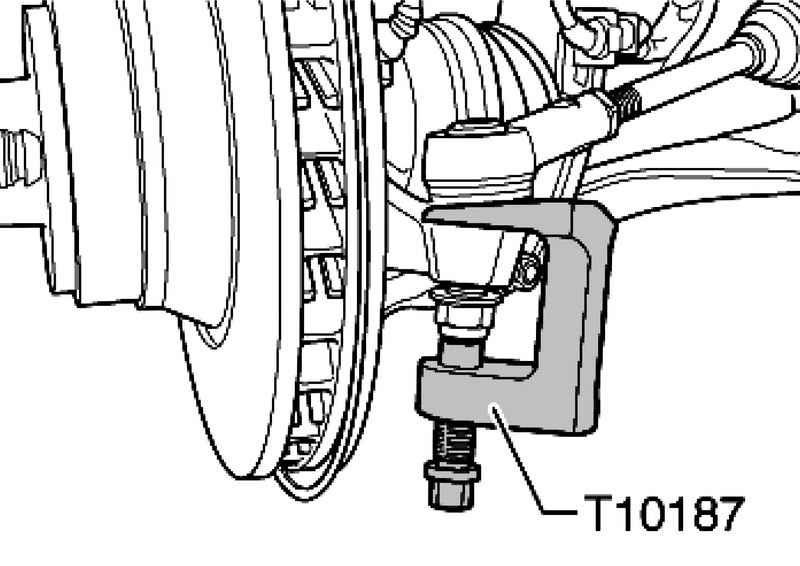
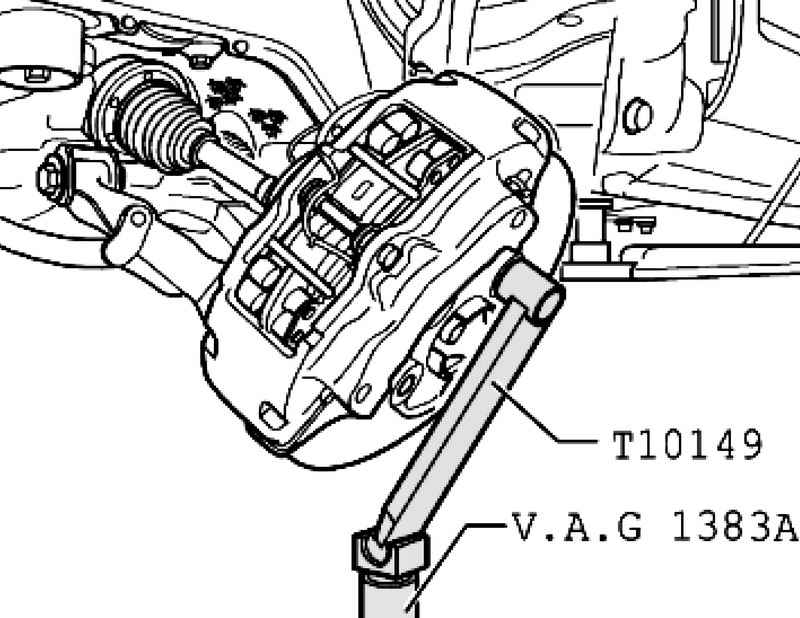
| Fig. 3.174. Removing the tie rod of the wheel bearing housing
|
Squeeze the drive shaft. At the same time follow the progress sufficient freedom hinges. Turn the wheel hub in a position to one of the holes for the wheel bolts was at the top.
Remove the bolt pneumatic elastic element to the lower arm. Remove the brake hose bracket from the wheel bearing housing. Remove the connecting rod to the stabilizer. Remove the bolt from the lower arm. Lower wheel bearing housing so that it became possible to remove the drive shaft.
Setting When you run into production glued drive shafts were replaced by shafts without adhesive bonding. If you find the car glued to the drive shaft should additionally perform the following three operations. Clean the splines of the hub and hinge from the remnants of lacquer thread.
ATTENTION Switchable stabilizers before starting work to include. Otherwise inadvertent inclusion of stabilizers can lead to injury. |
Restore the metal surface and degrease the outer slots and hinge hub. Coat the splines of the outer CV joint threaded nail D 154 000 A1. Further installation applies to both drive shafts, in this case, note the following. Enter the outer CV joint as far as possible in the splined hub.
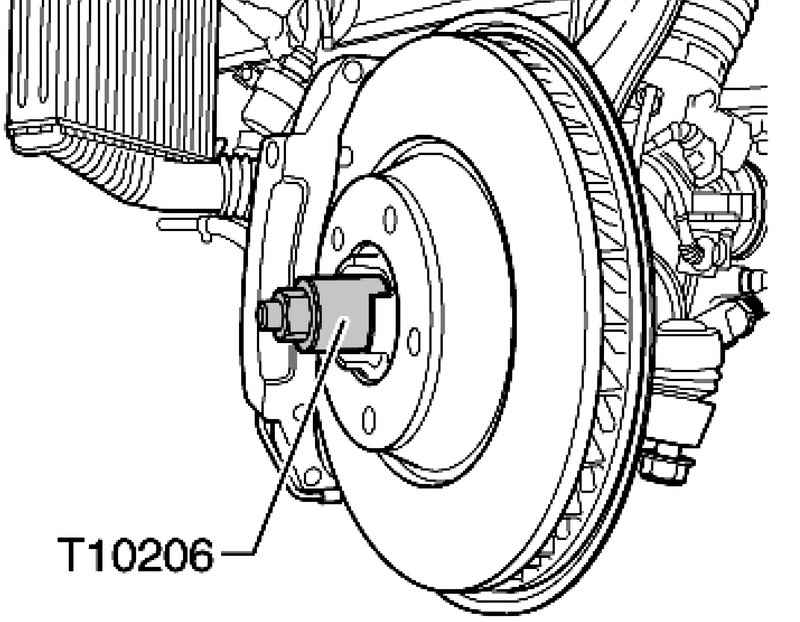
Using the tool for tightening T10206 tighten the drive shaft until it stops (Fig. 3.178). Remove tool for tightening T10206. Further installation in reverse order.
Tightening torques The drive shaft to a flange of the main transmission M10 - 50 Nm + 90 ?°; The drive shaft to a flange of the main transmission M12 - 90 Nm + 90 ?°; The drive shaft to the bearing hub for vehicles with 16 '' wheels (use a new nut) - 200 Nm; The drive shaft to the bearing hub for vehicles with 17 '' / 18 '' wheels (use a new nut) - 500 Nm; The upper arm to the bearing housing (use a new nut) - 95 Nm.
|