add to favorites contacts sitemap
REPAIR MAINTENANCE OPERATION OF MOTOR VEHICLES
Volkswagen Touareg (from 2003 to 2006, the year of issue)

general info. full specifications. diagnostics. hints. tips. tricks
Volkswagen Touareg
Home
 
Volkswagen
Touareg
Operation and maintenance of car
Engine
Preliminary checks on the car
Inspection of the absence of leaks and damage
Checking the V-ribbed belt
Removing and installing V-ribbed belt (gasoline engine 4,2L)
Removing and installing V-ribbed belt (gasoline engine 3,2L)
Checking the belt pulley on the bias (petrol engine 4,2L)
Removal and installation of the bottom screen proofing engine compartment
Removal and installation of the top casing of the engine
Check compression (petrol engine 3,2L)
Check compression (diesel engine 5,0L)
The mechanical part (petrol engines 3,2L)
The mechanical part (petrol engines 4,2L)
The mechanical part (diesel engines 5,0L)
Removing and installing subframe
Pressurization system (diesel engines)
Cooling system (petrol engines)
The cooling system (diesel engines)
Lubrication (petrol engines)
Lubrication system (diesel engines)
Injection System (petrol engines)
Fuel injection system (diesel engines)
Exhaust
FUEL (beninovye engines)
Tables
Transmission
Chassis
Steering Gear
Brakes
Onboard electric
Body
diagrams


Hit Counter by Digits


print page printable version

Removal and installation of the bottom screen proofing engine compartment


In some embodiments, the configuration engine compartment is equipped with extra protection from the bottom.

Screen proofing front side
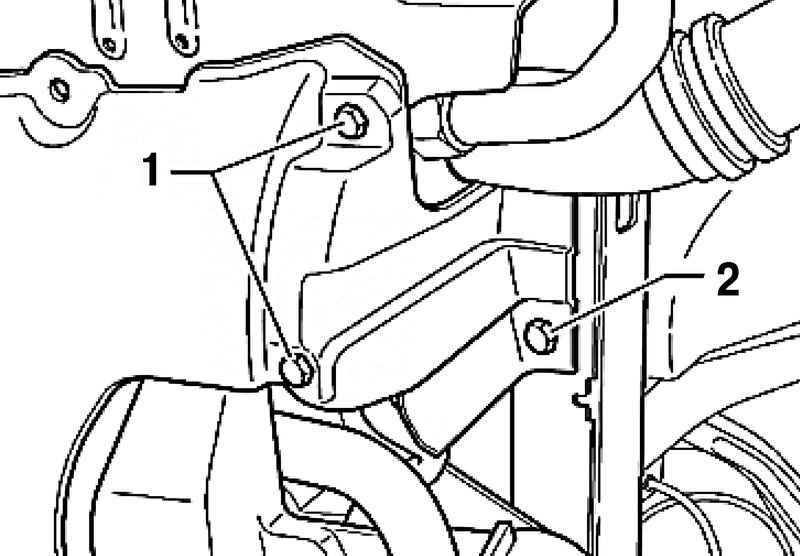
Fig. 2.8. Screen proofing front side 1, 2 - bolts


Figure 2.8 shows the left side of the screen mount front noise insulation. Right mount a mirror image of the left.
To remove or install noise insulation of the front of the screen, you must first remove and install the side bolts.

Front and rear screen proofing
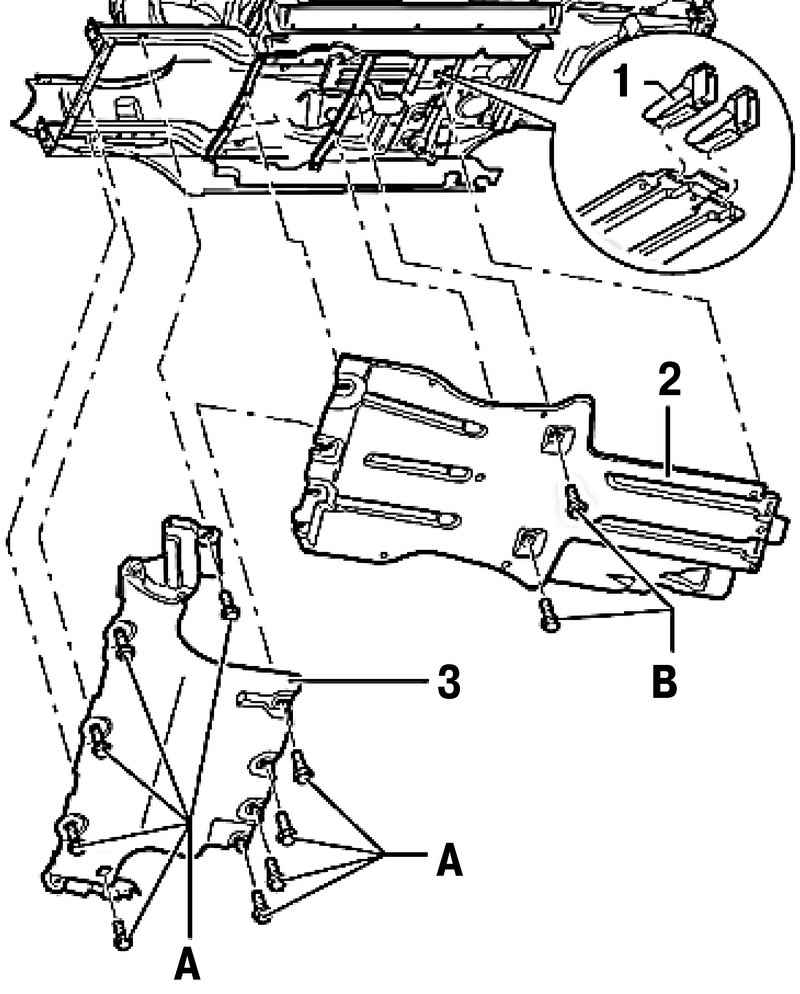
Fig. 2.9. Front and rear screen proofing


The front and rear noise insulation screens are shown in Figure 2.9.
To remove the screen, first unscrew bolts A, remove the front screen proofing 3.
Then unscrew the screws B, remove the rear screen proofing 2 of spring mounts 1.
Tighten the bolts to a torque of 8 Nm.


« previos page
Checking the belt pulley on the bias (petrol engine 4,2L)
next page »
Removal and installation of the top casing of the engine

Copyright © 2010 AutoManuals.biz. Trademarks belong to their respective owners. All rights reserved.