printable version printable version
Removing and installing rear propshaft
Work on the rear propeller shaft should be carried out on double-seat lift with a platform. Before removing the position of all parts in relation to each other tick. The assembly is carried out in the same position, otherwise there is an imbalance that can cause damage to the bearings and manifest in the form of increased noise. If there is a rattling sound when driving you must remove the front propeller shaft from the front flange of the main transmission and shifting one mounting hole, screw again. If a rattling sound did not disappear, rear driveshaft rear main transmission can be shifted by 5 holes and the rear propeller transfer case 2 holes. The rear propeller shaft bend, keep only the fastening of the intermediate bearing up.
Withdrawal On vehicles with automatic transmission selector switch in position ?«N?». Set the focus of the brake pedal VAG 1869/2. Raise the vehicle. Remove the rear part of the exhaust system. In the presence of - remove underbody protection under the propeller shaft.
|
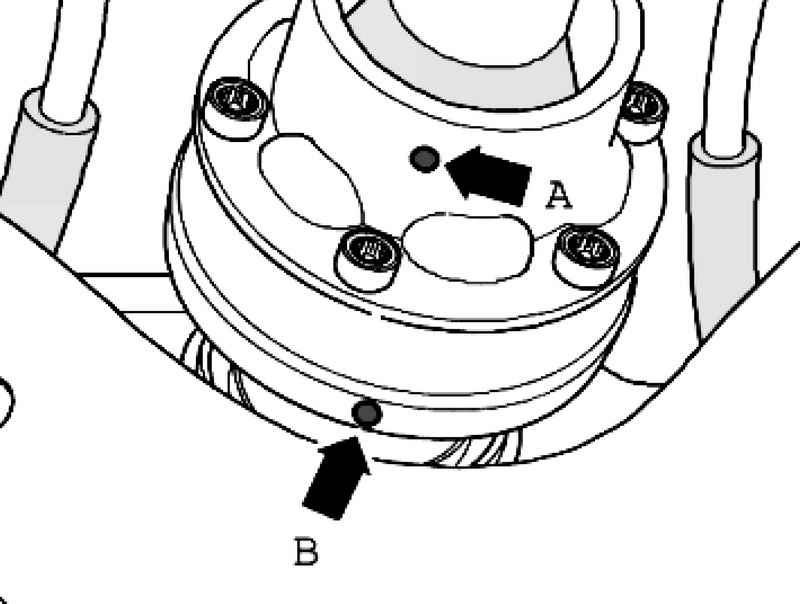
| Fig. 3.134. The marking on the rear propeller shaft and flange / propeller shaft
|
Check the rear propeller shaft and flange / rear propeller shaft final drive marking (colored dot) (Fig. 3.134). In the absence of this marking - Mark the position of the propeller shaft flange with respect to the rear final drive.
Mark the position of the rear propeller shaft with respect to the flange of the PTO on the transfer case (Fig. 3.135).
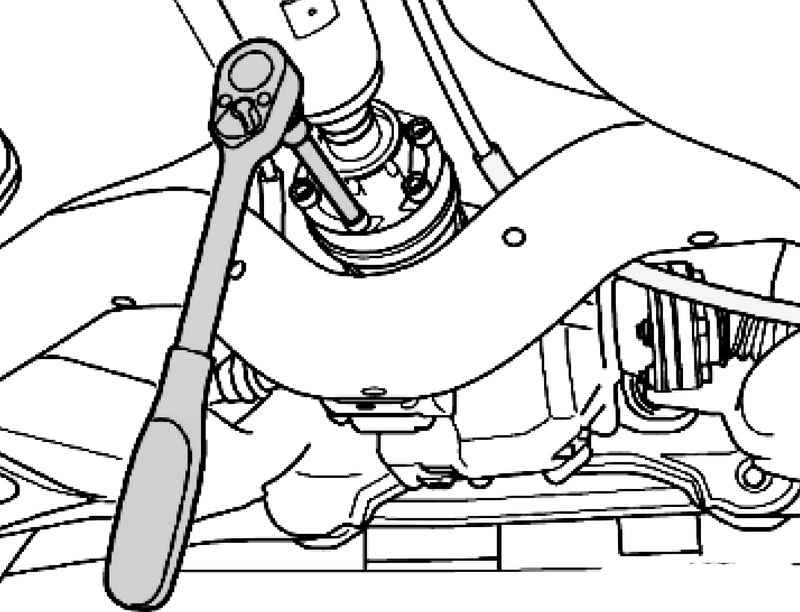
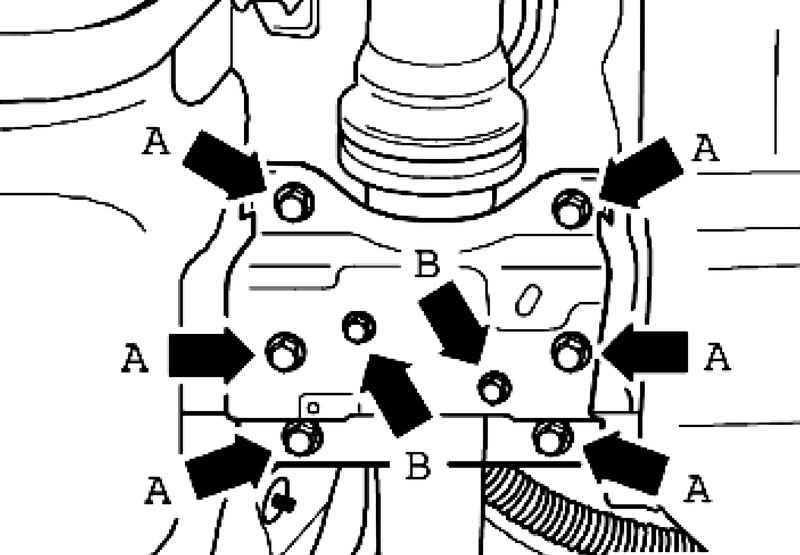
| Fig. 3.136. Unscrewing bolts rear propeller shaft at the rear of the main transmission
|
3 Remove the lower mounting bolt rear propeller shaft at the rear of the main transmission (Fig. 3.136). Lower the car. Remove the brake pedal emphasis VAG 1869/2. Raise the vehicle. Turn the rear wheels in the same direction and thus tighten the rear driveshaft 1/2 turn (180 ?°). Lower the car. Set the focus of the brake pedal VAG 1869/2. Raise the vehicle. 3 Remove the lower mounting bolt rear propeller shaft at the rear of the main transmission.
| Fig. 3.137. Unscrewing bolts rear propeller shaft at transfer case
|
Remove the mounting bolts on the rear propeller shaft transfer case. To do this, keep the nut with a wrench (Fig. 3.137). Set the rack for the engine and gearbox VAG 1383 A, with a universal focus gearbox 1359/2 under the bracket mounted units / rear axle. Beneath the bracket mounted units wooden lining Fig. N39-10040.
| Fig. 3.138. The front bolts on the bracket mounted units
|
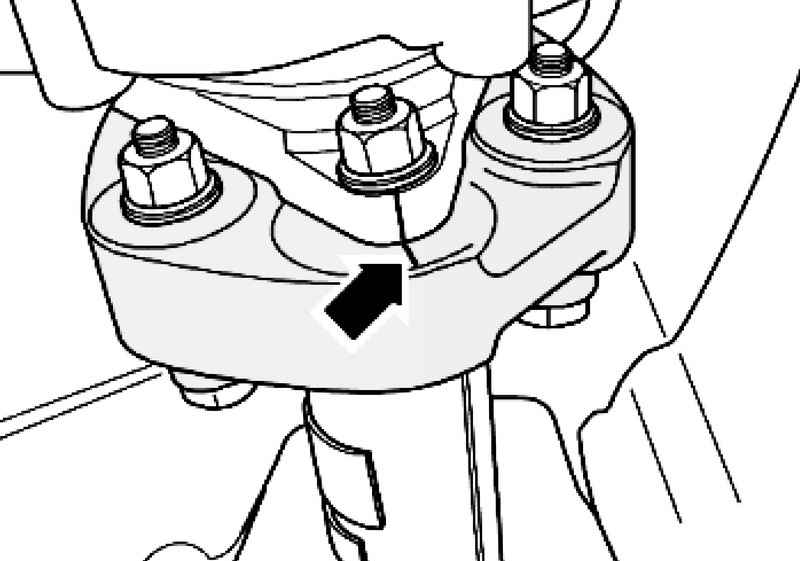
Remove the two front bolts on the bracket mounted units (Fig. 3.138).
Lower bracket mounted units with a reception for the engine and gearbox VAG 1383 A on the value of A = 50 mm (Fig. 3.139). To avoid damaging the rear propeller shaft, assistant needed for removal. Unscrew the bolts B for intermediate support about 2 turns.
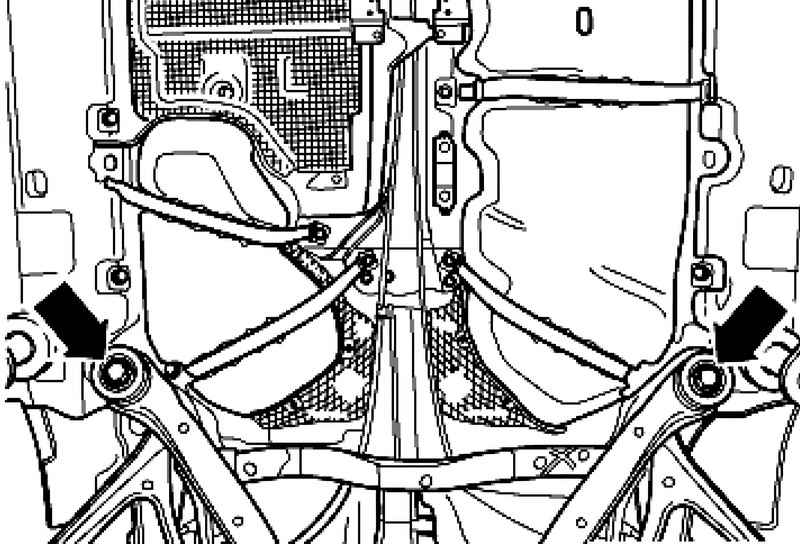
| Fig. 3.140. Fixing the intermediate support on the body
|
Remove the intermediate support bracket on the body A (Fig. 3.140).
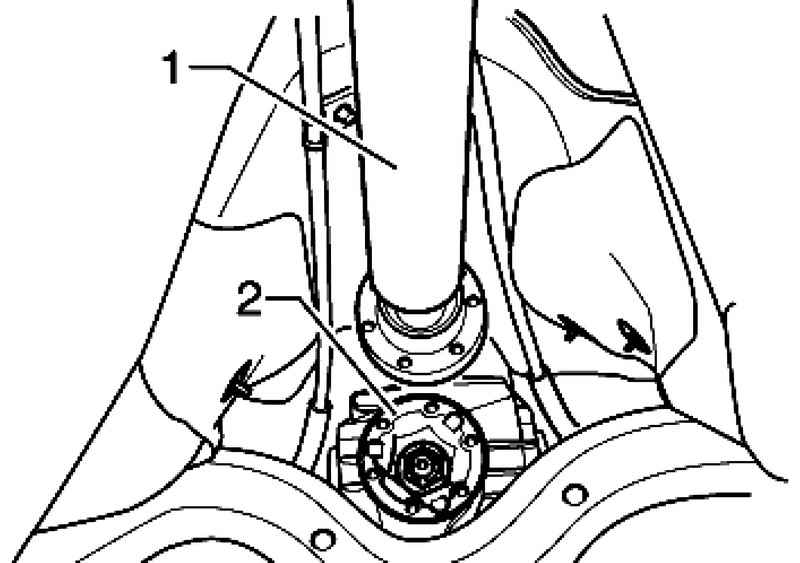
Press the rear propeller shaft 1 from the rear of the main gear 2 and turn over the flange of the main transfer (Fig. 3.141). Carefully remove the rear propeller shaft with spigot flange PTO / transfer case. Remove the rear driveshaft. Put the rear propeller shaft mounting positions of the intermediate support upwards.
Setting Install in reverse order, with the following should be considered. Always replace the mounting bolts rear propeller shaft.
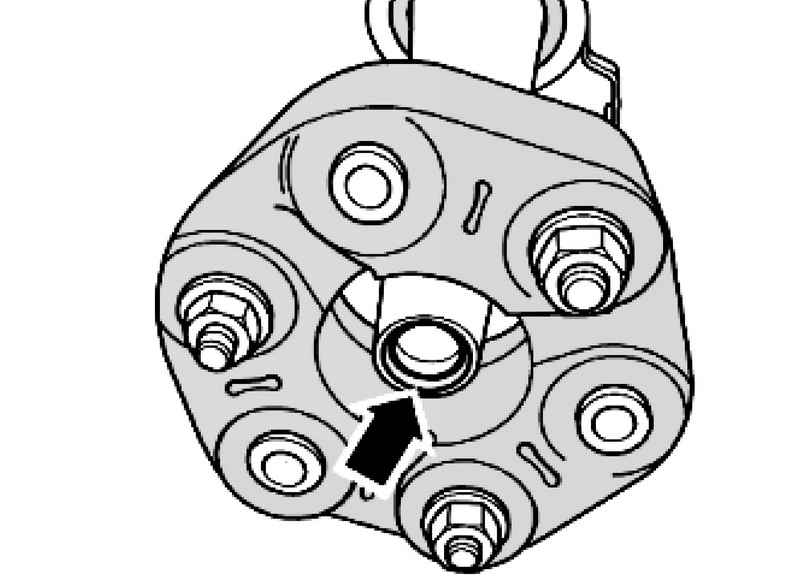
| Fig. 3.142. O-ring on the flange of the rear propeller shaft
|
O-ring on the flange of the rear propeller shaft and transfer case must not be damaged during assembly or disassembly (Fig. 3.142). Replace if damaged rear propeller shaft. The rear propeller shaft bend, set vertically on guide pin. After unscrewing the rear propeller shaft flange, install the intermediate support without load After installation, set the rear propeller shaft center bearing with no load. Install the back part of the exhaust system. Screw bolts of the rear propeller shaft and tighten with torque. If there is - install underbody protection under the propeller shaft.
|