printable version printable version
Removing and installing the camshaft and controls the valve timing
Withdrawal Bring engine to TDC. Remove the timing belt and camshaft gear, removing and installing toothed belt tension. The left cylinder head Remove the cylinder head cover.
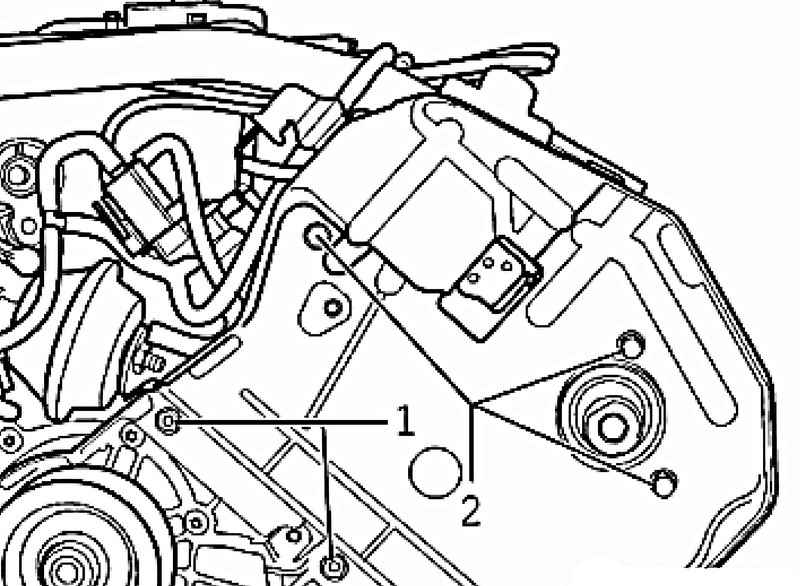
Turn off fixing bolts 1 and 2 and remove the back cover of a gear belt (Fig. 2.126).
The right cylinder head Remove the cylinder head cover. Remove the discharge roller 1.
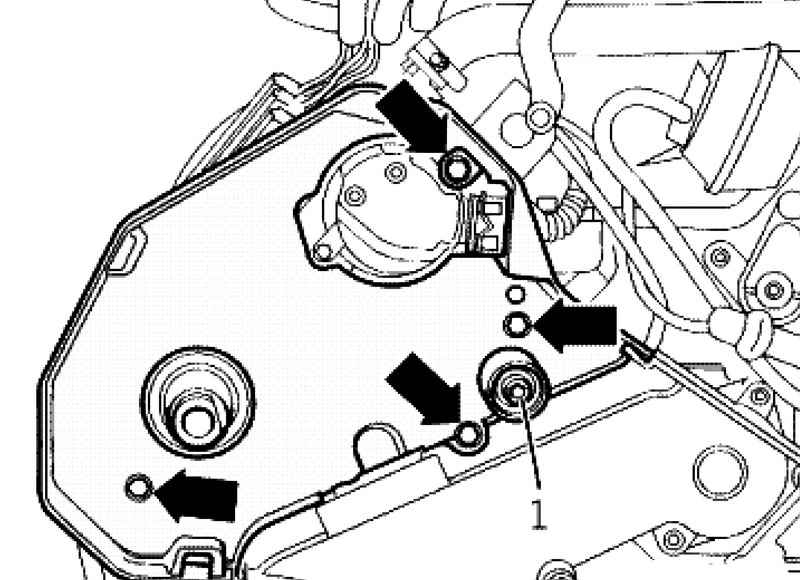
| Fig. 2.127. Bolts of fastening the back cover of a gear belt
|
Turn off fixing bolts (see. Fig. 2.127) and remove the back cover of a gear belt. Disconnect the plug from the Hall sensor and remove the case with the cap and cone.
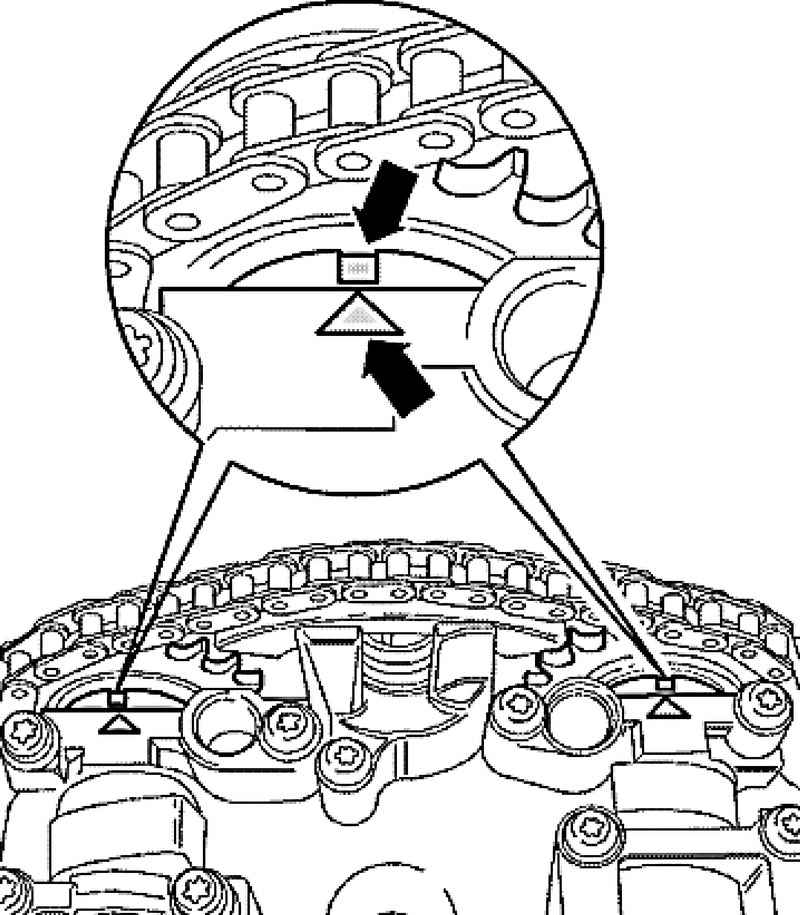
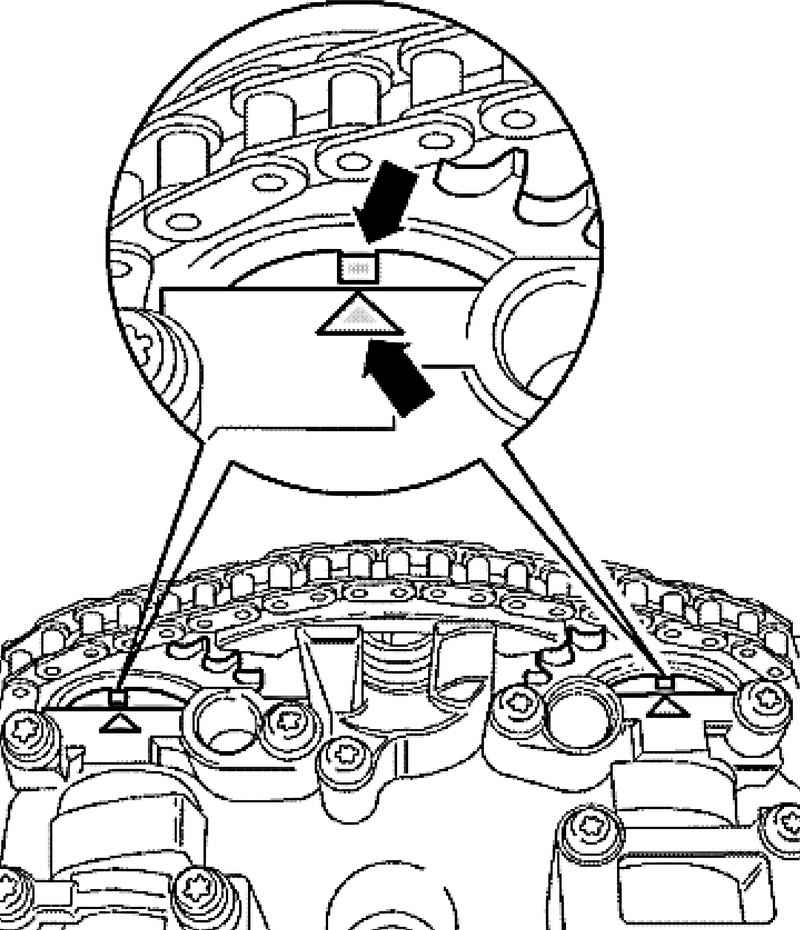
Check TDC position of camshafts. The marks on the camshafts should coincide with the two arrows on the bearing cover (Fig. 2.128). Continued use of the old roller chain drive camshafts
Before removing the tick roller chain (Fig. 2.129) (eg., Apply paint an arrow indicating the direction of the chain).
NOTE Do not apply on the chain using punch marks or leave notches. |
Fix the regulator valve timing by means of the chain tensioner to 3366 (Fig. 2.130).
NOTE If too much tightening the chain tensioning regulator valve timing may be damaged. |
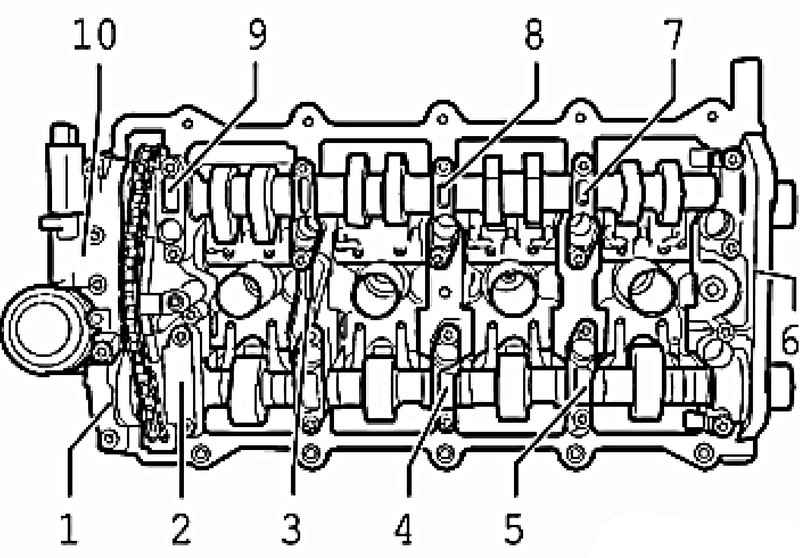
Mark, as shown, regardless of the damage to the bearing caps designation of mounting position and sequence (eg. Water-resistant felt-tip pen). Remove the fixing bolts regulator valve timing. Remove the bearing cover 1.
| Fig. 2.131. The sequence of removing the bearing cap
|
Remove bearing caps 2, 4, 6, 8 and 9 and in accordance with the sequence of removal (Fig. 2.131). Put them on a clean surface. Remove bearing caps 3, 5 and 7 to turn crosswise and remove them. Remove both camshaft control valve timing and place them on a clean surface.
Setting Replace the semi-circular cap. Replace the gasket regulator valve timing.
Place the roller chain to camshaft drive gears are as follows. Continued use of the old roller chain drive camshafts
When using the new chain drive camshafts
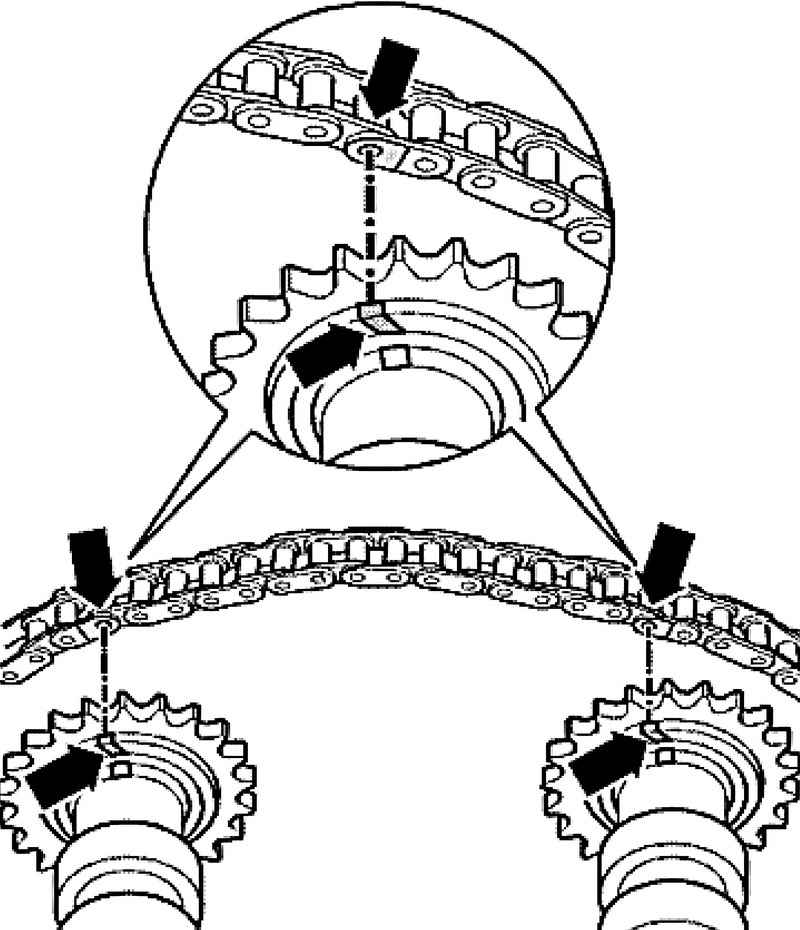
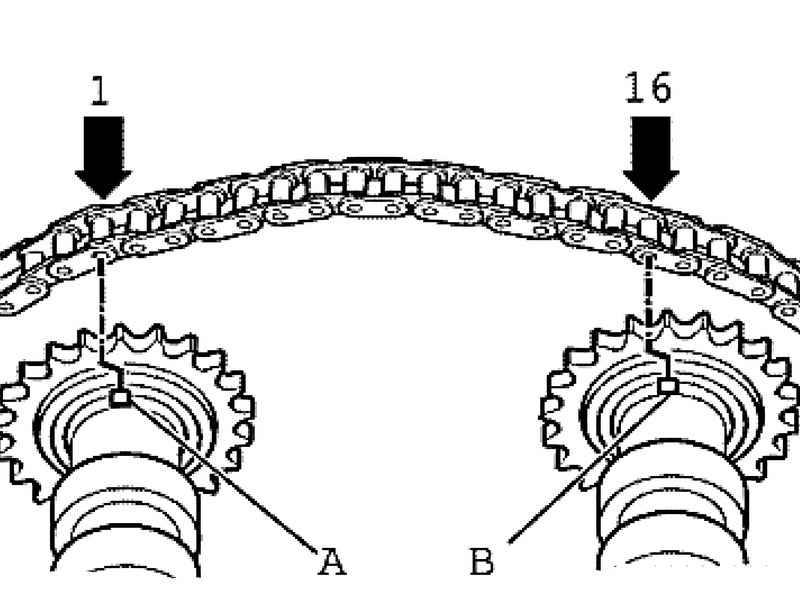
| Fig. 2.133. Number of rollers between the marks on the camshaft sprocket
|
The distance between the grooves A and B should be 16 chain rollers. The figure shows, in some places on the gears must be mounted rollers 1 and 16. The rollers chain 1 and 16 are displaced opposite slots A and B, each at half the width of the tooth to the left (Fig. 2.133). Insert the regulator valve timing between the roller chain drive camshafts. Include worn camshafts with roller chain and the regulator valve timing in the cylinder head. Lubricate the grooves of camshafts with engine oil.
NOTE Fitting sleeves for the bearing caps and the regulator valve timing must be inserted into the cylinder head. |
Install bearing caps 3, 5 and 7, in accordance with the designation and screw new bolts alternating crosswise. Tightening torque: 5 N ?· m + to tighten on 1/4. (90 ?°) Screw the regulator valve timing 10. Tightening torque: 5 N ?· m + to tighten on 1/4. (90 ?°) Install chain tensioner.
Check TDC position of camshafts. The marks on the camshafts should coincide with the two arrows on the bearing cover (Fig. 2.134).
NOTE To mark matched, if necessary, turn the camshaft slightly back and forth. |
Lightly cover the double bearing 6 and the bearing cover 1 sealant AMV 188 001 02 and Install both covers. Tightening torque: 5 N ?· m + to tighten on 1/4. (90 ?°) Install the remaining bearing caps. Tightening torque: 5 N ?· m + to tighten on 1/4. (90 ?°) Replace camshaft seals. Replace the seals Hall sensors. Gently press the lid emphasis collet 3202. Further installation is performed in reverse order.
NOTE After installing the camshafts can not start the engine for about 30 minutes. Lifters should be upset. (Otherwise, the touch of valves with pistons). After working on the valve mechanism scroll the engine by hand to make sure that none of the valve is not in contact with the piston. |
Before installing apply to the joints of the front and back covers of bearings of a small amount of sealant AMV 188 001 02 (Fig. 2.135).
|