add to favorites contacts sitemap
REPAIR MAINTENANCE OPERATION OF MOTOR VEHICLES
Volkswagen Touareg (from 2003 to 2006, the year of issue)

general info. full specifications. diagnostics. hints. tips. tricks
Volkswagen Touareg
Home
 
Volkswagen
Touareg
Operation and maintenance of car
Engine
Preliminary checks on the car
The mechanical part (petrol engines 3,2L)
The mechanical part (petrol engines 4,2L)
Checking the valve guides
Replacing the oil seal on the side of the crankshaft vibration damper
Removing and installing drive plate
Removal and installation of the flange on the side of the drive plate
Removal, installation and tension of the toothed timing belt
Checking axial clearance of camshafts
Replacing the camshaft seals
Replacement seals Hall sensors
Removing and installing the camshaft and controls the valve timing
The mechanical part (diesel engines 5,0L)
Removing and installing subframe
Pressurization system (diesel engines)
Cooling system (petrol engines)
The cooling system (diesel engines)
Lubrication (petrol engines)
Lubrication system (diesel engines)
Injection System (petrol engines)
Fuel injection system (diesel engines)
Exhaust
FUEL (beninovye engines)
Tables
Transmission
Chassis
Steering Gear
Brakes
Onboard electric
Body
diagrams


Hit Counter by Digits


print page printable version

Replacement seals Hall sensors


The order of work (left cylinder head)
Disconnect the connectors for ignition coils and fuel injectors and set aside the wire.
Disconnect the plug from the Hall sensor.
Remove the sensor together with a plug and the plug.

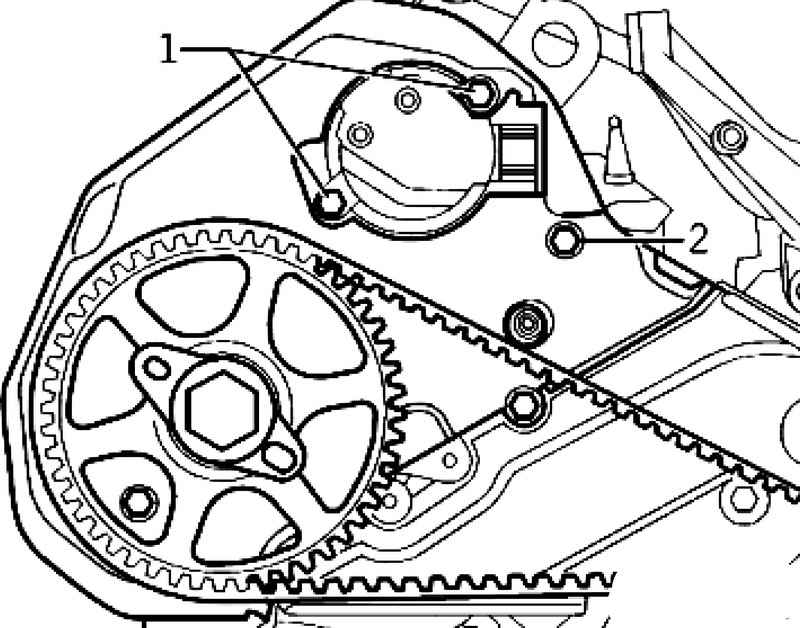
The right cylinder head
Remove the right cover of the toothed belt.
Disconnect the plug from the Hall sensor.
Loosen the screws 1 on the Hall sensor.

Sensor bolt and back cover of a gear belt
Fig. 2.122. Sensor bolt and back cover of a gear belt


Remove bolts 2 on the back cover of a gear belt (Fig. 2.122).
Pull the back cover of a gear belt slightly forward and remove the case of the Hall sensor with plug and plug.

Setting finger
Fig. 2.123. Setting finger


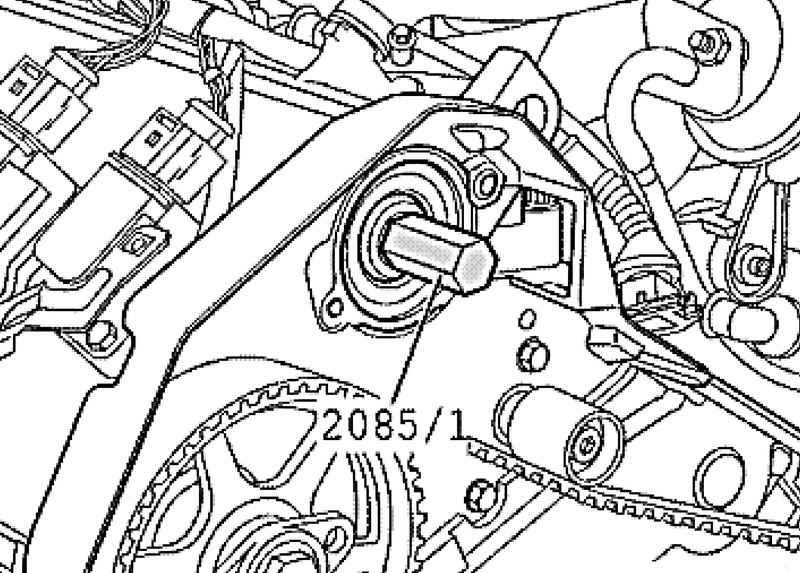
Tighten finger 2085/1, as shown in Figure 2.123.

Installing oil seal puller
Fig. 2.124. Installing oil seal puller


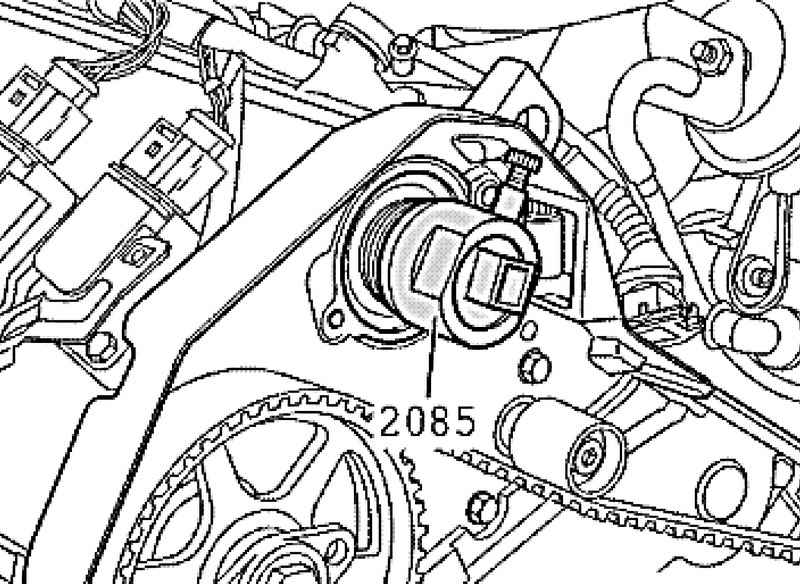
Remove the inner part of oil seal extractor 2085 a few turns of the outer part and lock the knurled screw (Fig. 2.124).
Lubricate threaded head of a stripper with engine oil, and attach strongly pressing it, screw as far as possible in the packing.
Loosen knurled screw and scroll through the inside of the stripper finger against 2085/1 until the gland will not be removed.
Clamp the puller gland for flat edges in a vise. Tongs remove the gland.

Pressing gland
Fig. 2.125. Pressing gland


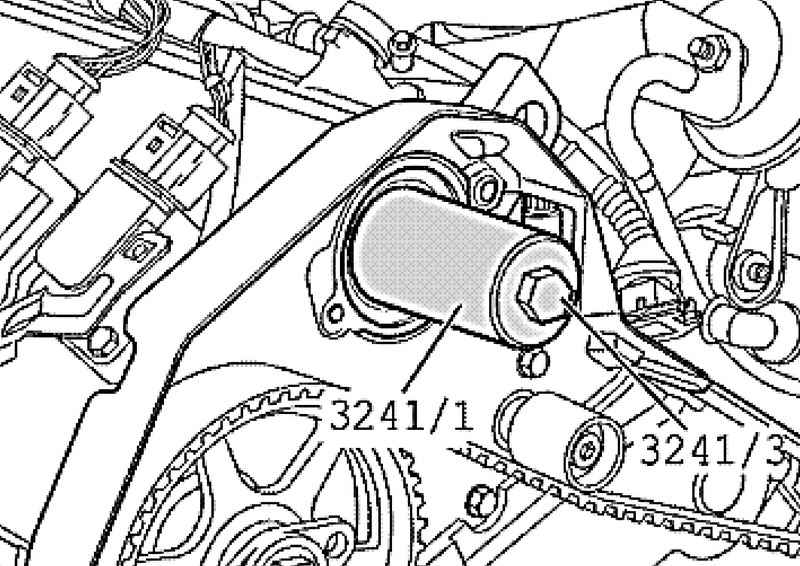
Finally, press in new shaft seal mandrel 3241/1 and bolt 3241/3 flush (Fig. 2.125).
Further installation is performed in reverse order.


« previos page
Replacing the camshaft seals
next page »
Removing and installing the camshaft and controls the valve timing

Copyright © 2010 AutoManuals.biz. Trademarks belong to their respective owners. All rights reserved.