printable version printable version
Wipers
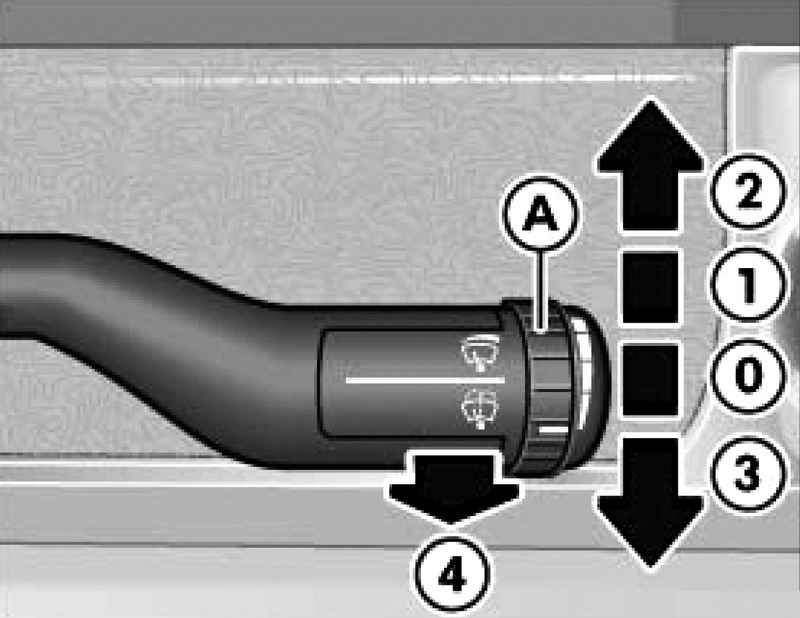
Management wipers and washer carried by the stalk.
Intermittent motion brushes (windshield) Push the lever upwards to fixed position 1. To set the range of motion, turn the dial to A. Rotate up - pause shorter down - longer. By turning up the way achieved the longest wiper.
Intermittent motion brush (rear window) Push the lever forward. The wiper is activated every six seconds. Retighten the lever all the way forward to enable automatic cleaning and washing the rear window. Release the lever. The wiper operates four seconds, then starts every six seconds.
The slow movement of the brush Push the lever upwards to fixed position 1. - Turn dial A to lock up.
Long movement brushes Move the lever up to the locked position 2.
Manual control wipers Push the lever down to position 3, when you only need to briefly turn on the windshield wipers.
Automatic cleaning and washing (windshield) Pull the lever briefly to position 4. Release the lever. Wipers operate four seconds.
Shutting down the wiper Slide the lever 0. Screen wipers and washer work only with the ignition.
ATTENTION Worn and dirty wiper blades do not provide good visibility, which reduces traffic safety. At low temperatures, include washers only after warming the windshield with the help of heat and hot air. Otherwise, windshield washer fluid could freeze on the windshield and restrict visibility. In the winter before the first turning on the wiper, make sure that the brushes are not frozen to the glass. Otherwise, if the brush primerzli may be damaged as a brush and drive motors for windshield wipers. |
Rain sensor
Rain sensor regulates the intensity of the windshield wipers depending on rainwater flow (Fig. 1.46).
Turning the rain sensor Slide the lever in position 1. Set the dial to A according to the desired sensitivity of the rain sensor. When the knob is turned up - the sensitivity higher. When you turn the ring down - lower sensitivity. When you turn the dial up to the stop is achieved by a slow continuous operation wiper. Rain sensor controls the intermittent movement of the brush. When the ignition is turned off, you should re-install the rain sensor adjustment. To do this, turn off and back on again ratcheting brushes.
Washers Headlight washers clean. When the windscreen and headlamp washers are activated in the event that sum stalk on the steering wheel at least half a second when the near or far light. Regularly, such as refueling, scraped from tissue culture headlights stubborn dirt (such as insect remains).
NOTE To ensure the normal operation of the headlight cleaning in the winter, clean the nozzles in the bumper holders of snow and remove the ice with a spray to remove ice. |
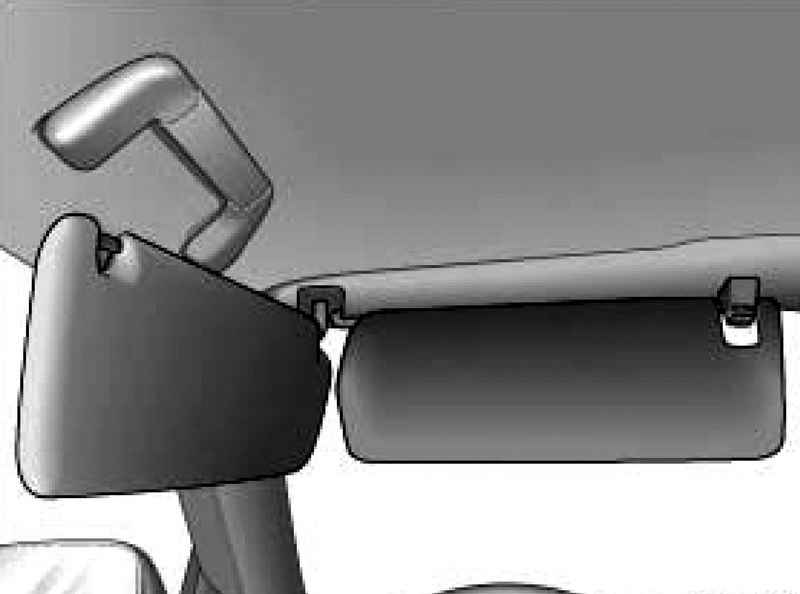
Sun visors
One of the twin peaks in the driver's seat can be removed from the holder to the right and move it to the door (Fig. 1.47). Cosmetic mirror visor covered with a lid. When the cover is slid into the ceiling lights fixture.
NOTE Before leaving the vehicle, slide the cover in place. This prevents battery discharge. |
|