add to favorites contacts sitemap
REPAIR MAINTENANCE OPERATION OF MOTOR VEHICLES
Volkswagen Touareg (from 2003 to 2006, the year of issue)

general info. full specifications. diagnostics. hints. tips. tricks
Volkswagen Touareg
Home
 
Volkswagen
Touareg
Operation and maintenance of car
Engine
Transmission
Chassis
Steering Gear
Brakes
Onboard electric
Body
Exterior body parts
Removing and installing bonnet
Removing the gas stop
Release of gas from the gas stop
Removing and installing insulation
Removing and installing bonnet
Adjust the bonnet
Disconnecting the flexible cable
Removing and installing tailgate
Adjusting the tailgate with the hinge
Adjusting lock loop
Removal and installation of a gas cap lock
Removal and installation of elements of the locking and unlocking doors
Removing and installing lock the tailgate
Removing and installing lock loop soft closing
Removal and installation of the motor opening the tailgate
Removing and installing rear spoiler
Removal and installation of elements of the locking and unlocking the fuel filler flap
Adjusting the door
Removal and installation of the lock cylinder housing
Removal and installation of door handles
Removing and installing door lock
Adjusting the back door
Removal and installation of the lock cylinder housing
Lifting sunroof with glass panel
Removing the glass panel lifting and sliding sunroof
Check the parallel progress of the glass panel
Fit seal the hatch panel
Removing sunglass
Removal and installation of facing of the front bumper
Removing and installing rear bumper fascia
diagrams


Hit Counter by Digits


print page printable version

Check the parallel progress of the glass panel


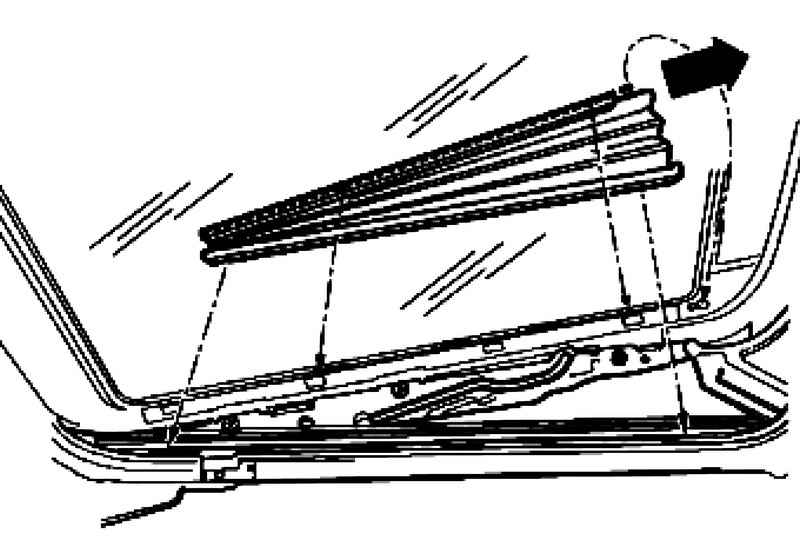
Tilt the glass panel.
Slide the sunshade back as much as possible.
Release bellows bottom, from the back.
Free gaiter from above, from the front.

Removing the gaiter
Fig. 8.44. Removing the gaiter


Pull the bellows back of the slots and remove it (Fig. 8.44).
Remove the glass panel folding door.

Marking to install the hatch to the starting position
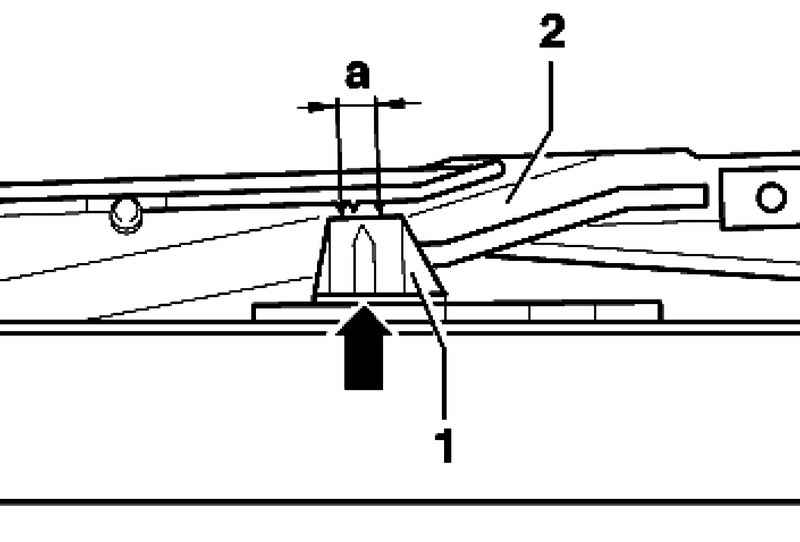
Fig. 8.46. Marking to install the hatch to the starting position


The markings on the top of the rail, rear, 1 on both sides should be between a on the guide rocker 2 (Fig. 8.46).
Rocker guide 2 should be enshrined in the guide rail (of the hand does not move).

Adjusting the parallel progress of the glass panel
Remove the actuator lifting and sliding sunroof.

NOTE
Adjust the parallel course can be removed only when the drive and the glass panel (in the home position).

The markings on the top of the rail, rear, 1 on both sides should be between a on the guide rocker 2 (Fig. 8.46).
Rocker guide 2 should be enshrined in the guide rail (of the hand does not move).
Slide the upper part of the guide 1 from front to back and set it so that the center between the markings.
Set in the drive position (starting position).
Finally, check the reference position of the hatch.


« previos page
Removing the glass panel lifting and sliding sunroof
next page »
Fit seal the hatch panel

Copyright © 2010 AutoManuals.biz. Trademarks belong to their respective owners. All rights reserved.