add to favorites contacts sitemap
REPAIR MAINTENANCE OPERATION OF MOTOR VEHICLES
Volkswagen Touareg (from 2003 to 2006, the year of issue)

general info. full specifications. diagnostics. hints. tips. tricks
Volkswagen Touareg
Home
 
Volkswagen
Touareg
Operation and maintenance of car
Engine
Transmission
Chassis
Steering Gear
Brakes
Onboard electric
Body
Exterior body parts
Removing and installing bonnet
Removing the gas stop
Release of gas from the gas stop
Removing and installing insulation
Removing and installing bonnet
Adjust the bonnet
Disconnecting the flexible cable
Removing and installing tailgate
Adjusting the tailgate with the hinge
Adjusting lock loop
Removal and installation of a gas cap lock
Removal and installation of elements of the locking and unlocking doors
Removing and installing lock the tailgate
Removing and installing lock loop soft closing
Removal and installation of the motor opening the tailgate
Removing and installing rear spoiler
Removal and installation of elements of the locking and unlocking the fuel filler flap
Adjusting the door
Removal and installation of the lock cylinder housing
Removal and installation of door handles
Removing and installing door lock
Adjusting the back door
Removal and installation of the lock cylinder housing
Lifting sunroof with glass panel
Removing the glass panel lifting and sliding sunroof
Check the parallel progress of the glass panel
Fit seal the hatch panel
Removing sunglass
Removal and installation of facing of the front bumper
Removing and installing rear bumper fascia
diagrams


Hit Counter by Digits


print page printable version

Removal and installation of door handles


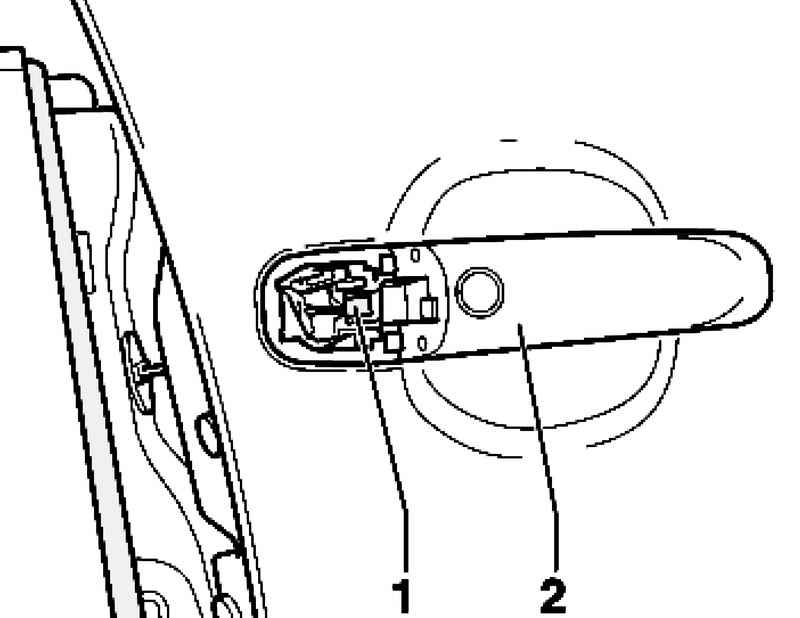
Withdrawal
The door handle with the wiring system Kessy.
Remove the clamp 1 of the door handle.

Removing the handle
Fig. 8.30. Removing the handle


Slightly turning, remove the door handle 2 of the door (Fig. 8.30).

Setting

Locking the door opening lever
Fig. 8.31. Locking the door opening lever


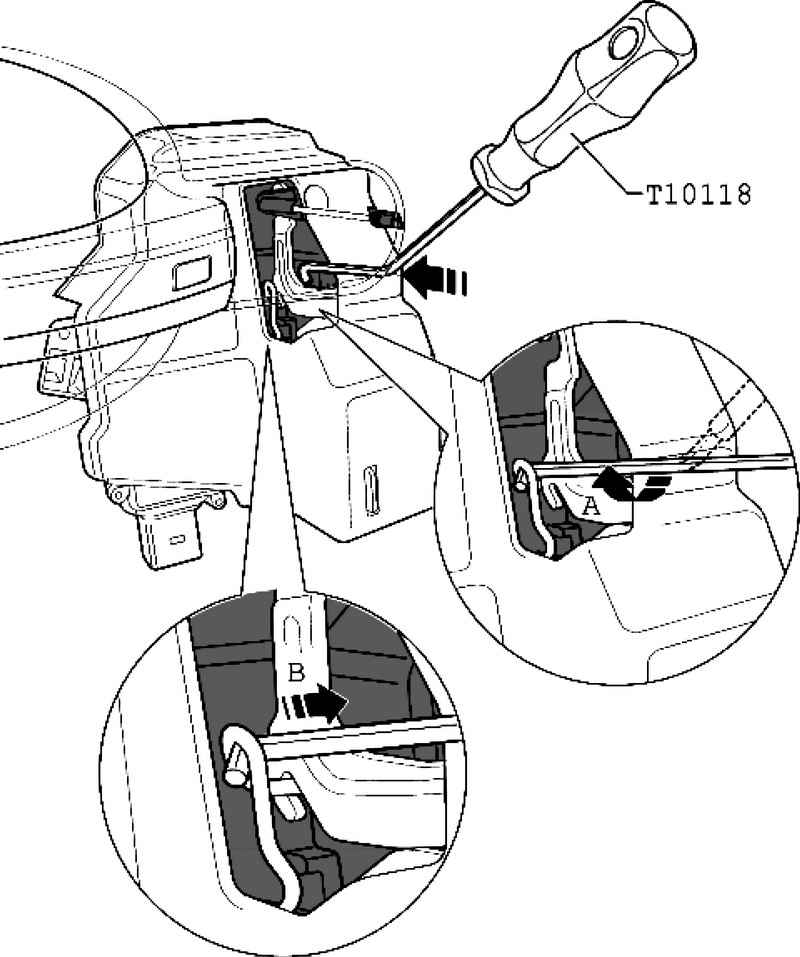
Through a hole in the outer door panel insert installation tool T 10118 on the door (Fig. 8.31).
To improve visibility, illuminate the interior of the door flashlight.
Hook assembly tool spring A.
Pull assembly tool B, hang the spring to the hook of the door lock.
The lever opening the door is locked.
Insert the handle of the door.
Put the clamp 1 and fix it to the door handle 2 (Fig. 8.30).

NOTE
During the installation of the door handle 2 to be pressed against the outer skin of the door.
Pull the handle can break the lock lever open.

Refit the lock cylinder.
In conclusion with the door open to test the door handle and lock, since incorrect adjustment and fixation of the flexible cable door can not be opened.


« previos page
Removal and installation of the lock cylinder housing
next page »
Removing and installing door lock

Copyright © 2010 AutoManuals.biz. Trademarks belong to their respective owners. All rights reserved.