printable version printable version
Removing the glass panel lifting and sliding sunroof
Raise the hatch. Slide the sunshade back. Free gaiter strap from the bottom, from the back of the door. Then release the gaiter strap from the top, starting from the front door.
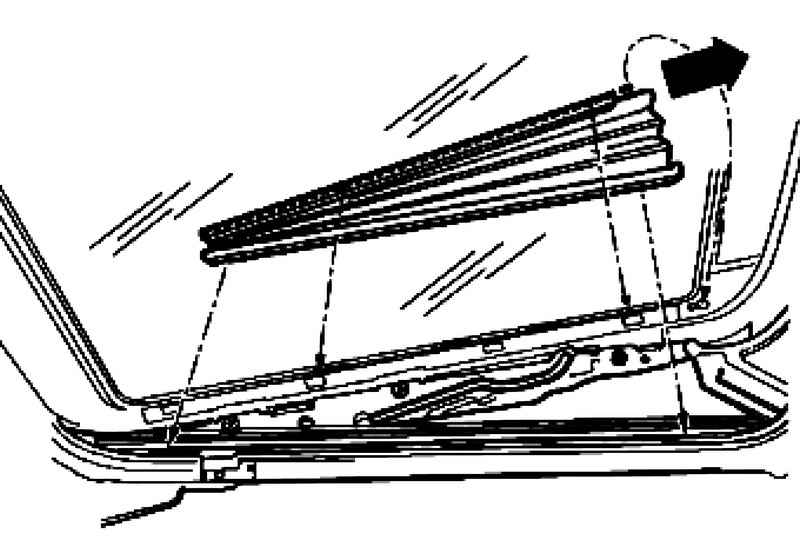
Pull the bellows of the slots back and remove it (Fig. 8.44). Remove the fixing screws (three on each side) 4.5 Nm.
Remove the glass panel lifting and sliding roof, lifting it up (Fig. 8.45).
NOTE When removing the glass panels open the door to "getsffnet / open" is prohibited because the glass panel do not squeeze drainage groove that because of this, may get stuck. |
Installing glass panel lifting and sliding sunroof The panel should be set to its original position (the panel of the hatch is closed)
Initial position
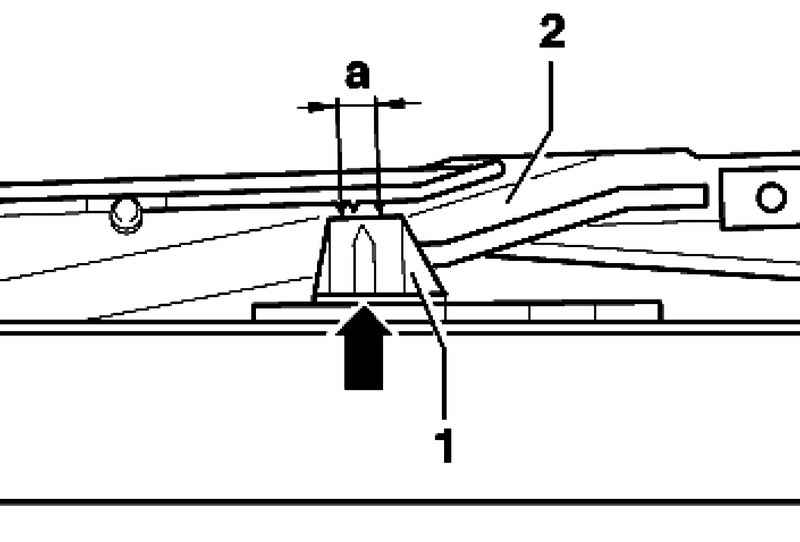
| Fig. 8.46. Marking to install the hatch to the starting position
|
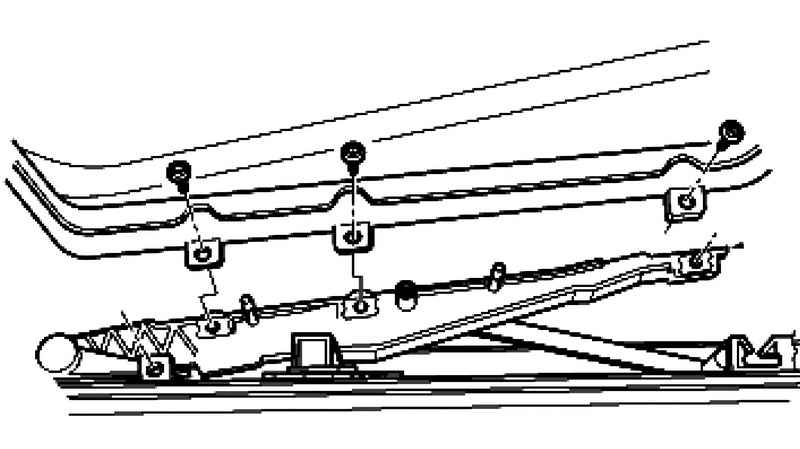
The markings on the top of the rail, rear, 1 on both sides should be between a on the guide rocker 2 (Fig. 8.46). Rocker guide 2 should be enshrined in the guide rail (of the hand does not move). If not, adjust the parallel turn. Insert the panel lifting and sliding roof on top and tighten the screws (backstage / cap) (Fig. 8.45). Do not overtighten the screws.
NOTE Tighten the screws after adjusting the height of the panel with a torque of 4.5 Nm. |
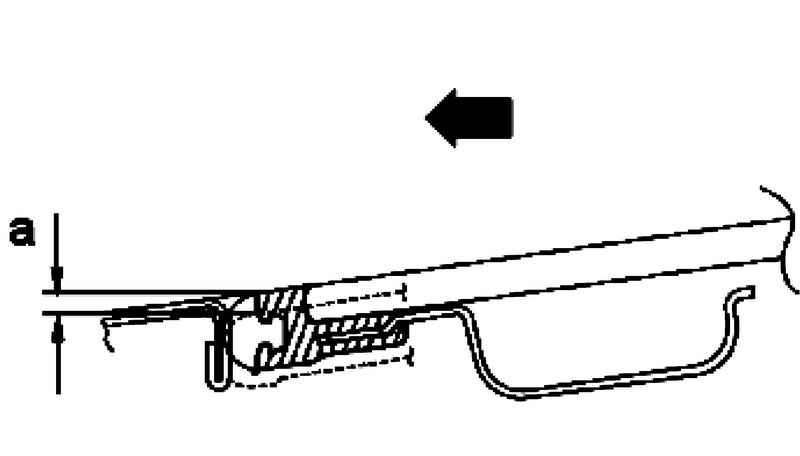
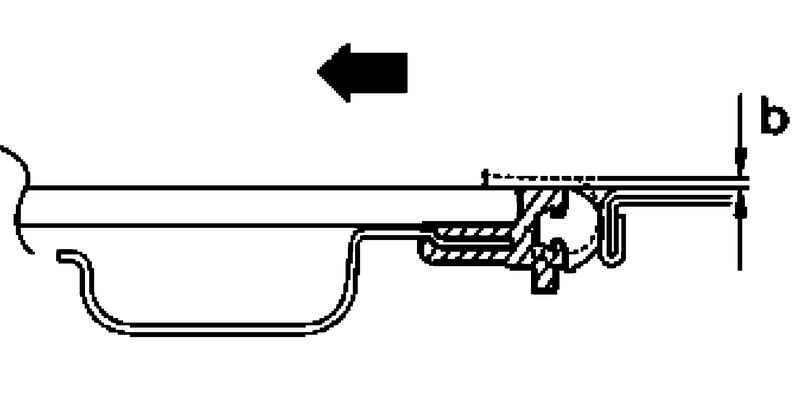
Adjust glass panel lifting and sliding roof (height adjustable) Starting position lifting and sliding roof must be correct. Raise a glass panel. Slide the sunshade back. Free gaiter strap from the bottom, from the back of the hatch (Fig. 8.44). Then release the gaiter strap from the top, starting from the front door. Pull the bellows back of the slots and remove it. Give a glass panel in the original position. Adjust glass panel sunroof adjustment front and rear in accordance with the drawings to avoid extraneous noise while driving. Adjust the front panel: a = 0-1 mm below the plane of the roof Arrow - direction of movement Adjust the rear panel: b = 0-1 mm above the roof plane Arrow - direction of movement Tighten the screws of the glass panel with a torque of 4.5 Nm.
| Fig. 8.48. The scheme of adjustment rear panel
|
|