add to favorites contacts sitemap
REPAIR MAINTENANCE OPERATION OF MOTOR VEHICLES
Volkswagen Touareg (from 2003 to 2006, the year of issue)

general info. full specifications. diagnostics. hints. tips. tricks
Volkswagen Touareg
Home
 
Volkswagen
Touareg
Operation and maintenance of car
Engine
Transmission
Chassis
Steering Gear
Brakes
Onboard electric
Body
Exterior body parts
Removing and installing bonnet
Removing the gas stop
Release of gas from the gas stop
Removing and installing insulation
Removing and installing bonnet
Adjust the bonnet
Disconnecting the flexible cable
Removing and installing tailgate
Adjusting the tailgate with the hinge
Adjusting lock loop
Removal and installation of a gas cap lock
Removal and installation of elements of the locking and unlocking doors
Removing and installing lock the tailgate
Removing and installing lock loop soft closing
Removal and installation of the motor opening the tailgate
Removing and installing rear spoiler
Removal and installation of elements of the locking and unlocking the fuel filler flap
Adjusting the door
Removal and installation of the lock cylinder housing
Removal and installation of door handles
Removing and installing door lock
Adjusting the back door
Removal and installation of the lock cylinder housing
Lifting sunroof with glass panel
Removing the glass panel lifting and sliding sunroof
Check the parallel progress of the glass panel
Fit seal the hatch panel
Removing sunglass
Removal and installation of facing of the front bumper
Removing and installing rear bumper fascia
diagrams


Hit Counter by Digits


print page printable version

Removal and installation of elements of the locking and unlocking the fuel filler flap


Node hatch fuel filler
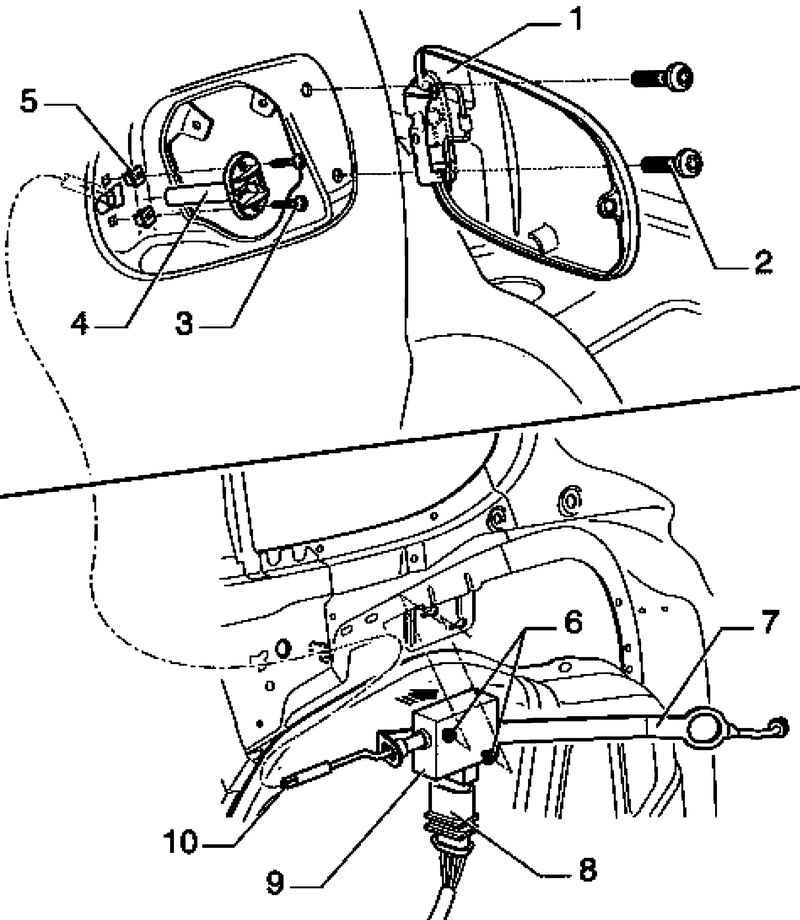
Fig. 8.24. Node hatch fuel filler: 1 - hatch of the fuel tank; 2 - the screw; 3 - the screw; 4 - the fastening member; 5 - spacer nut; 6 - the screw; 7 - drive emergency release; 8 - plug; 9 - electric opening the fuel filler flap; 10 - draft of the opening of the hatch


Withdrawal
Open the door of the fuel tank.
3 Remove the screws and remove the mounting plate 4 from the niche fuel filler.
Open the box and swing for the first aid kit in the side trim insulation.
On vehicles with CD-changer, disconnect the plug opening 8 motor fuel filler flap 9.
6 Loosen the screws with a screwdriver and slide the motor opening the fuel filler flap in direction of arrow 9 ago.
Remove the motor opening the fuel filler flap 9 driven 7 emergency release and pull open the hatch 10.

Setting
Installation is carried out in reverse order.


« previos page
Removing and installing rear spoiler
next page »
Adjusting the door

Copyright © 2010 AutoManuals.biz. Trademarks belong to their respective owners. All rights reserved.