add to favorites contacts sitemap
REPAIR MAINTENANCE OPERATION OF MOTOR VEHICLES
Volkswagen Touareg (from 2003 to 2006, the year of issue)

general info. full specifications. diagnostics. hints. tips. tricks
Volkswagen Touareg
Home
 
Volkswagen
Touareg
Operation and maintenance of car
Engine
Transmission
Chassis
Steering Gear
Brakes
Onboard electric
Body
Exterior body parts
Removing and installing bonnet
Removing the gas stop
Release of gas from the gas stop
Removing and installing insulation
Removing and installing bonnet
Adjust the bonnet
Disconnecting the flexible cable
Removing and installing tailgate
Adjusting the tailgate with the hinge
Adjusting lock loop
Removal and installation of a gas cap lock
Removal and installation of elements of the locking and unlocking doors
Removing and installing lock the tailgate
Removing and installing lock loop soft closing
Removal and installation of the motor opening the tailgate
Removing and installing rear spoiler
Removal and installation of elements of the locking and unlocking the fuel filler flap
Adjusting the door
Removal and installation of the lock cylinder housing
Removal and installation of door handles
Removing and installing door lock
Adjusting the back door
Removal and installation of the lock cylinder housing
Lifting sunroof with glass panel
Removing the glass panel lifting and sliding sunroof
Check the parallel progress of the glass panel
Fit seal the hatch panel
Removing sunglass
Removal and installation of facing of the front bumper
Removing and installing rear bumper fascia
diagrams


Hit Counter by Digits


print page printable version

Removal and installation of the lock cylinder housing


The handle and the door lock
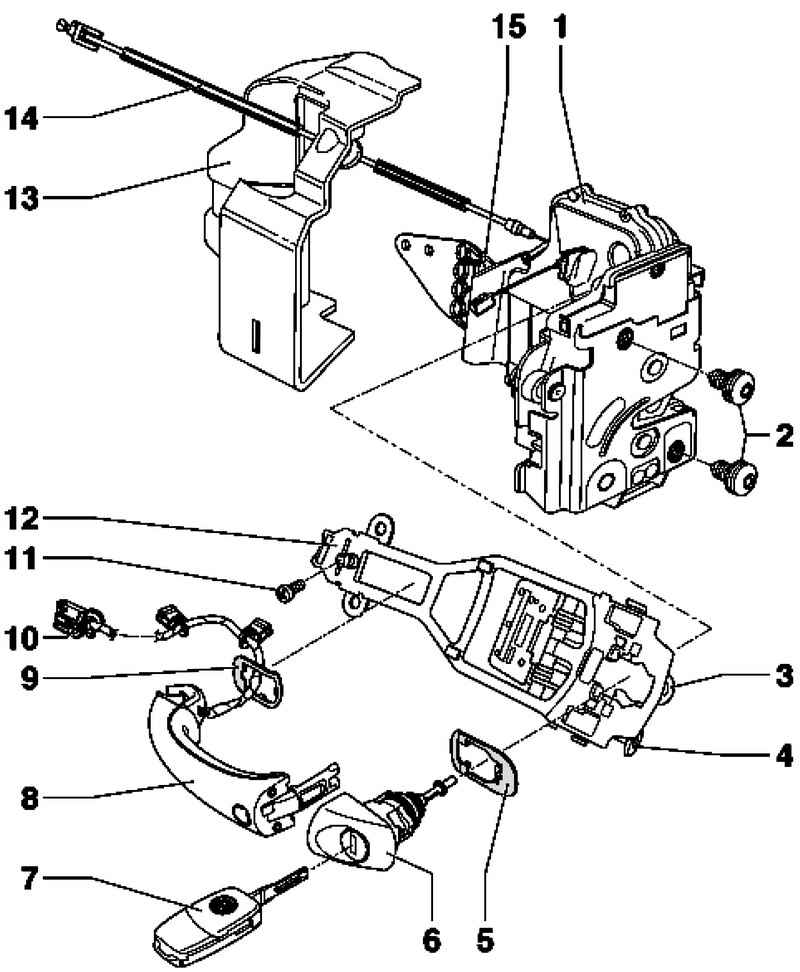
Fig. 8.27. The handle and the door lock 1 - lock the door; 2 - the screw; 3 - locking screw; 4 - a bolt on the inside by an asterisk; 5 - a lining; 6 - the case of the lock cylinder; 7 - Key; 8 - the handle of the door; 9 - a lining; 10 - wire touch sensor (kessy); 11 - the screw; 12 - mounting; 13 - cap; 14 - flexible cable; 15 - bracket


Withdrawal

Removing the cap
Fig. 8.28. Removing the cap


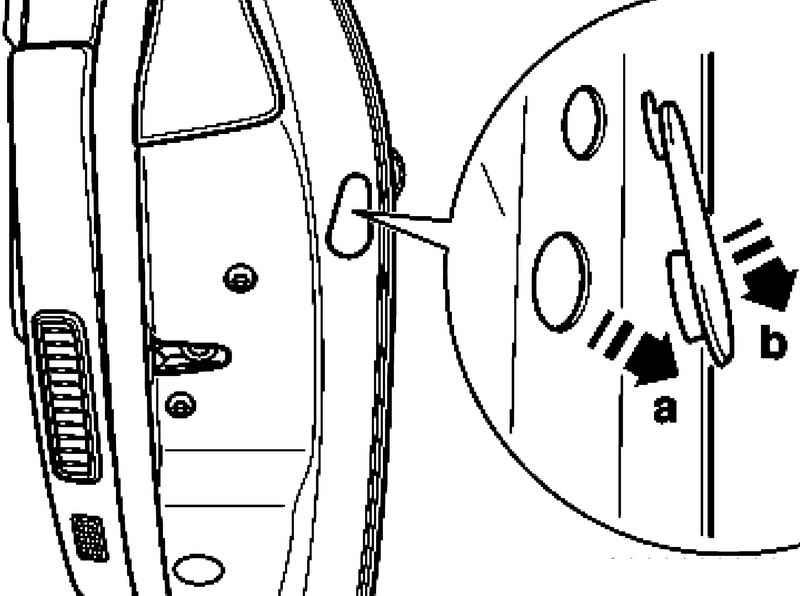
Pry the plug out of the lower hole a, then pull the cap down b (Fig. 8.28).

Retrieving the body of the lock cylinder
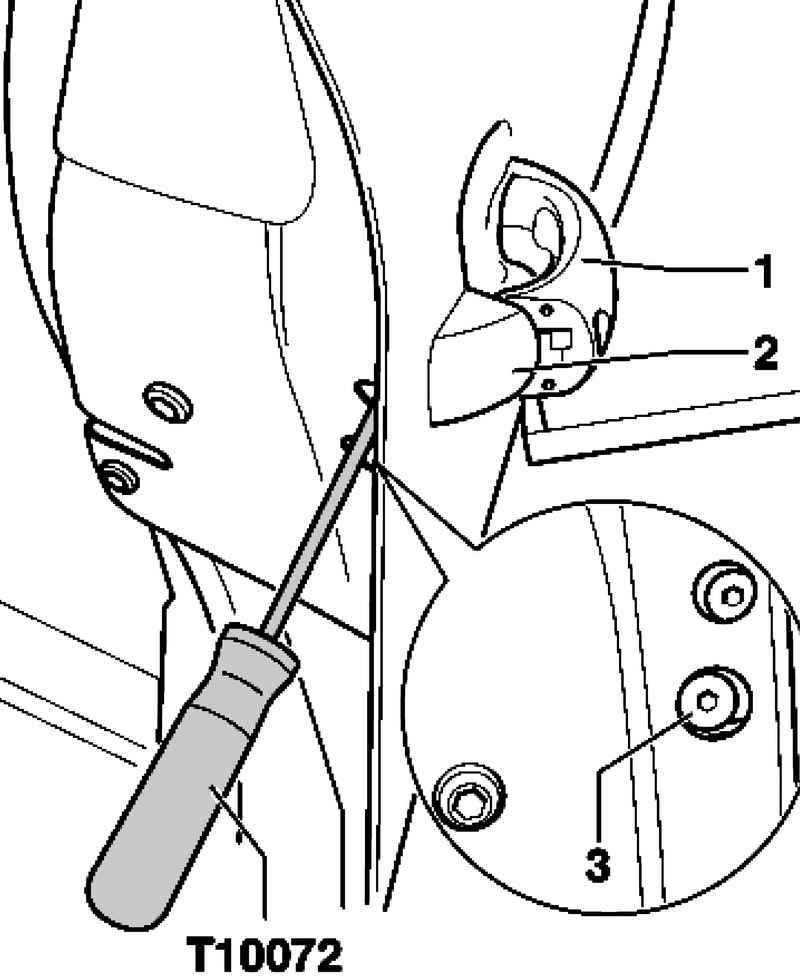
Fig. 8.29. Retrieving the body of the lock cylinder


Pull the door handle 1 and hold it. Remove the bolt 3 using a socket wrench T 10072 until it stops. So you release the lock cylinder housing 2 (Fig. 8.29).
If the housing of the lock cylinder lock cylinder itself is not, you can remove the body of the lock cylinder 2 at right angles to the door of the attachment of the door handle.
If the body of the cylinder lock is the lock cylinder, loosen the locking screw 3 so that you can remove the housing 2 at a right angle mounting of the door handle.

Setting
Insert the lock cylinder body at a right angle in the fixation of the door handle.
Now tighten the socket wrench to bolt mount.
A distinct click indicates that the door handle again engages in the housing of the lock cylinder.

NOTE
During installation, the housing of the lock cylinder to be pressed against the outer door panel on the inside. The door handle is mounted on the door tightly.

Further installation is performed in reverse order.
Finally, you must check the operation of the door handle and lock, since incorrect adjustment and fixation of the flexible cable door can not be opened.


« previos page
Adjusting the door
next page »
Removal and installation of door handles

Copyright © 2010 AutoManuals.biz. Trademarks belong to their respective owners. All rights reserved.