add to favorites contacts sitemap
REPAIR MAINTENANCE OPERATION OF MOTOR VEHICLES
Volkswagen Touareg (from 2003 to 2006, the year of issue)

general info. full specifications. diagnostics. hints. tips. tricks
Volkswagen Touareg
Home
 
Volkswagen
Touareg
Operation and maintenance of car
Engine
Transmission
Chassis
Steering Gear
Brakes
Onboard electric
Body
Exterior body parts
Removing and installing bonnet
Removing the gas stop
Release of gas from the gas stop
Removing and installing insulation
Removing and installing bonnet
Adjust the bonnet
Disconnecting the flexible cable
Removing and installing tailgate
Adjusting the tailgate with the hinge
Adjusting lock loop
Removal and installation of a gas cap lock
Removal and installation of elements of the locking and unlocking doors
Removing and installing lock the tailgate
Removing and installing lock loop soft closing
Removal and installation of the motor opening the tailgate
Removing and installing rear spoiler
Removal and installation of elements of the locking and unlocking the fuel filler flap
Adjusting the door
Removal and installation of the lock cylinder housing
Removal and installation of door handles
Removing and installing door lock
Adjusting the back door
Removal and installation of the lock cylinder housing
Lifting sunroof with glass panel
Removing the glass panel lifting and sliding sunroof
Check the parallel progress of the glass panel
Fit seal the hatch panel
Removing sunglass
Removal and installation of facing of the front bumper
Removing and installing rear bumper fascia
diagrams


Hit Counter by Digits


print page printable version

Removing and installing bonnet


Elements of unlocking and locking the hood
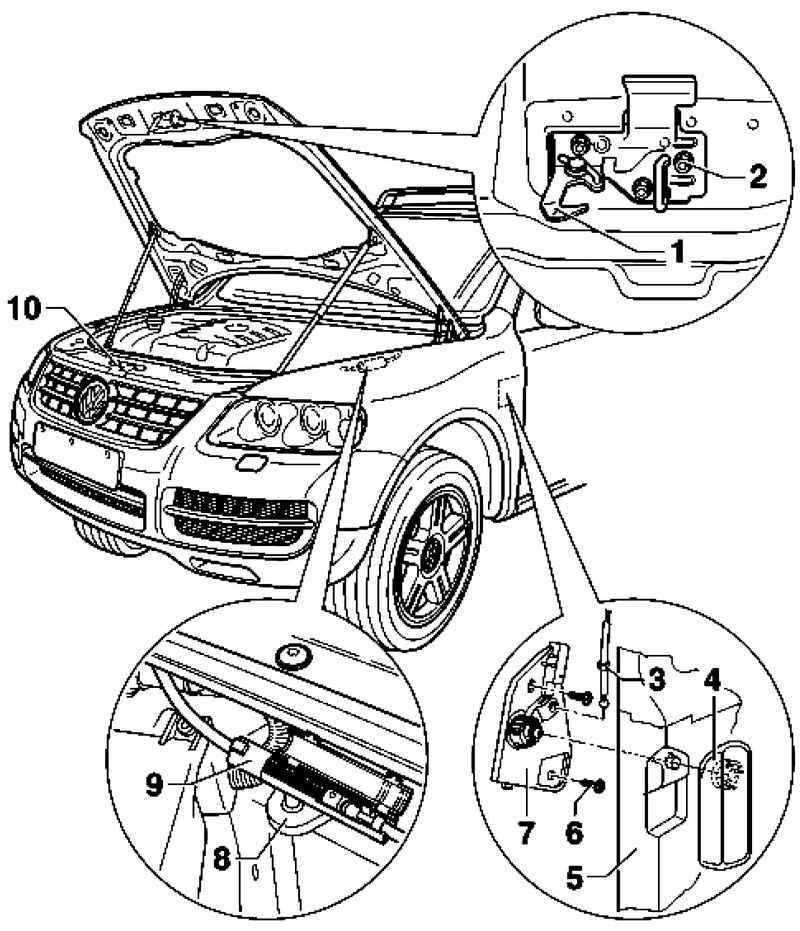
Fig. 8.5. Elements of unlocking and locking the bonnet: 1 - hook; 2 - hex nut; 3 - flexible cable; 4 - the bonnet release lever; 5 - facing the bottom of the rack as well; 6 - a bolt; 7 - support bracket; 8 - the holder; 9 - clutch flexible cable; 10 - lock hood


Withdrawal
Remove the grille.

Clutch flexible cable
Fig. 8.6. Clutch flexible cable


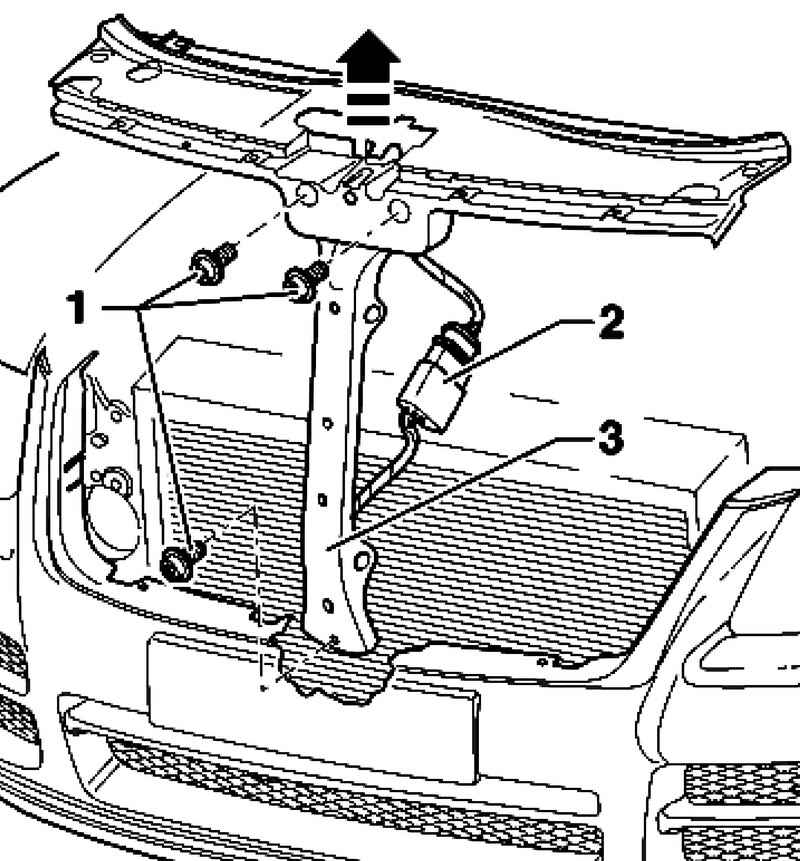
Remove the grip flexible cable 1 up from the holder (Fig. 8.6).
Disconnect the flexible cable.
Disconnect plug 2 bonnet contact switch F266.
Unscrew bolts 1 from the frame of the radiator and bumper bracket.

Removing the lock support
Fig. 8.7. Removing the lock support


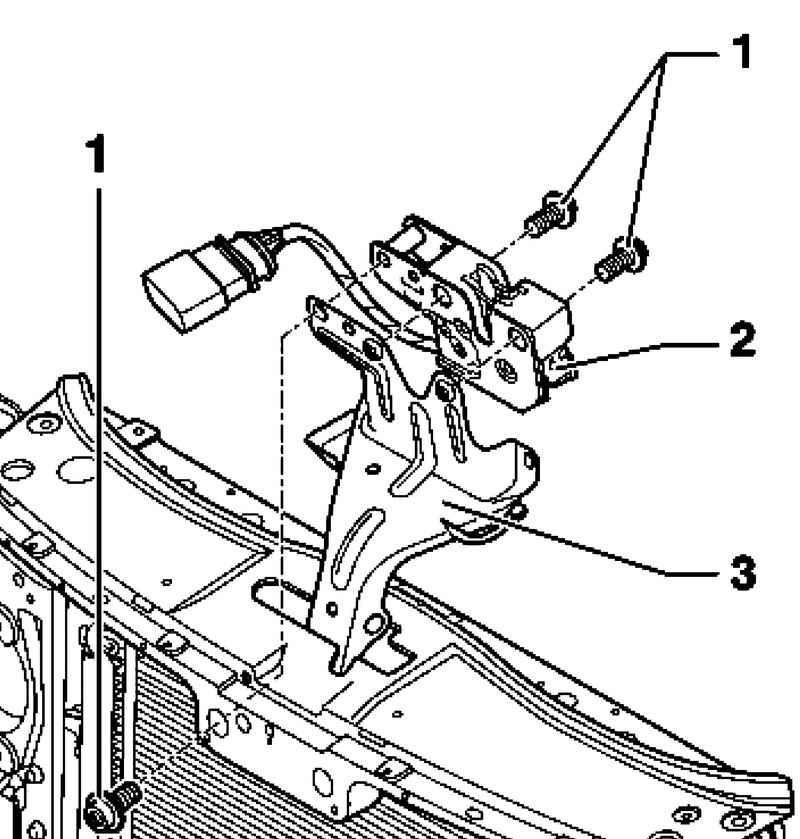
Remove bearing lock 3 with hood lock in the direction of sterlki in Figure 8.7.

NOTE
For better visibility of the lock of a cowl and prop lock had been removed from the frame radiator.
Prop lock can be removed from the radiator frame only in a downward direction.

Remove the screws 1, 2 of the bonnet lock support 3 in the frame radiator.

Removing the bonnet
Fig. 8.8. Removing the bonnet


Remove the hood latch up out of the hole in the frame of the radiator (Fig. 8.8).

Removing the cable lock actuator
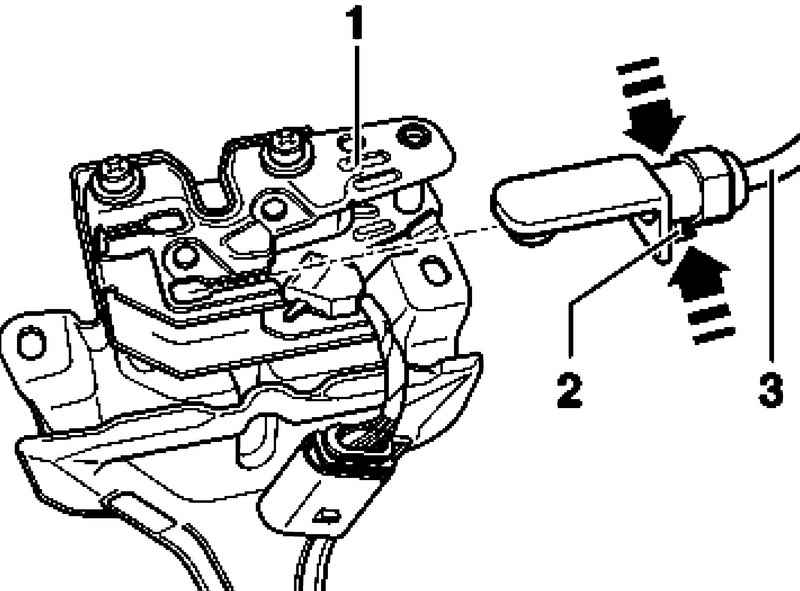
Fig. 8.9. Removing the cable lock actuator


To remove the cable lock actuator 3 Squeeze the loop 2 and the cable in the direction of the arrows in Figure 8.9.
Razblokireutsya locking mechanism, and you can now remove the cable from the bonnet 1.

Setting
Installation is carried out in reverse order.
Torque: bolts 19 Nm.

NOTE
When installing the bonnet should first tighten the bolts on the support of the castle.


« previos page
Removing and installing insulation
next page »
Adjust the bonnet

Copyright © 2010 AutoManuals.biz. Trademarks belong to their respective owners. All rights reserved.