add to favorites contacts sitemap
REPAIR MAINTENANCE OPERATION OF MOTOR VEHICLES
Volkswagen Touareg (from 2003 to 2006, the year of issue)

general info. full specifications. diagnostics. hints. tips. tricks
Volkswagen Touareg
Home
 
Volkswagen
Touareg
Operation and maintenance of car
Engine
Transmission
Chassis
Steering Gear
Brakes
Onboard electric
Body
Exterior body parts
Removing and installing bonnet
Removing the gas stop
Release of gas from the gas stop
Removing and installing insulation
Removing and installing bonnet
Adjust the bonnet
Disconnecting the flexible cable
Removing and installing tailgate
Adjusting the tailgate with the hinge
Adjusting lock loop
Removal and installation of a gas cap lock
Removal and installation of elements of the locking and unlocking doors
Removing and installing lock the tailgate
Removing and installing lock loop soft closing
Removal and installation of the motor opening the tailgate
Removing and installing rear spoiler
Removal and installation of elements of the locking and unlocking the fuel filler flap
Adjusting the door
Removal and installation of the lock cylinder housing
Removal and installation of door handles
Removing and installing door lock
Adjusting the back door
Removal and installation of the lock cylinder housing
Lifting sunroof with glass panel
Removing the glass panel lifting and sliding sunroof
Check the parallel progress of the glass panel
Fit seal the hatch panel
Removing sunglass
Removal and installation of facing of the front bumper
Removing and installing rear bumper fascia
diagrams


Hit Counter by Digits


print page printable version

Removing and installing rear bumper fascia


Lining the rear bumper
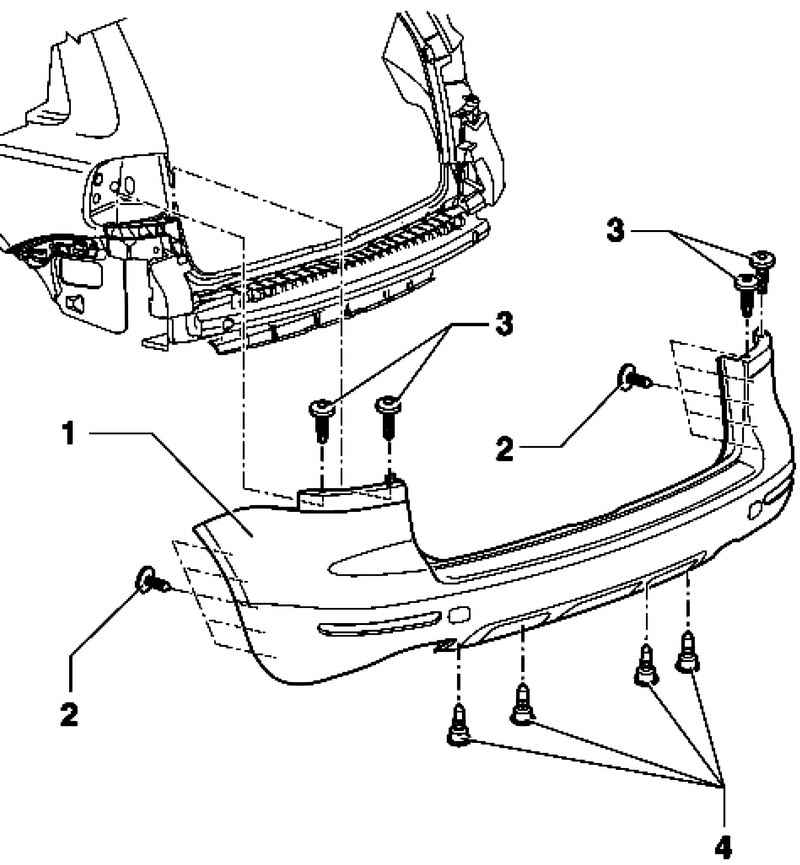
Fig. 8.55. Lining the rear bumper: 1 - facing; 2-4 - Bolts


NOTE
Depending on the model to be considered minor deviations.

NOTE
Depending on the model, for removal and installation must be considered minor deviations.

Withdrawal
Remove the rear lights.
3 Remove the screws under the rear lights.
Unscrew bolts 2 in the wheel wells.
Bottom unscrew 4 screws.
With the help of a second mechanic remove the bumper fascia along with the guide.
Disconnect, depending on the vehicle, all existing wires. electrical components.

Setting
Installation is carried out in reverse order.


« previos page
Removal and installation of facing of the front bumper
next page »
diagrams

Copyright © 2010 AutoManuals.biz. Trademarks belong to their respective owners. All rights reserved.